Customising systems extensively isn’t always necessary — many routine workflows can be automated quickly and easily using Odoo 18’s standard features. A key tool for this is the Automation Rules feature, which triggers specified actions under defined conditions.
In this updated guide, we’ll show you how to configure Automation Rules in Odoo 18 to effortlessly send payment notification emails to your customers.
How to access Automation Rules in Odoo 18
Before you start creating Automation Rules, you must enable the Developer Mode. There are two ways in which you can do this.
1. Odoo Debug browser extension
Install the following extension in your browser. Once it’s installed, you will see an icon on the top right corner of your browser window.
To enable Debug mode, click on the monkey icon. Once you click on it once, your debug mode will be activated. Check out the debug mode icon guide below:
 Debug mode off
 Debug mode on
 Assets debug mode on
Click once on the icon when the debug mode is off to turn it on. If you want to switch to assets debug mode, double click on the icon. We will not be using the third mode for this tutorial.
2. Odoo Settings
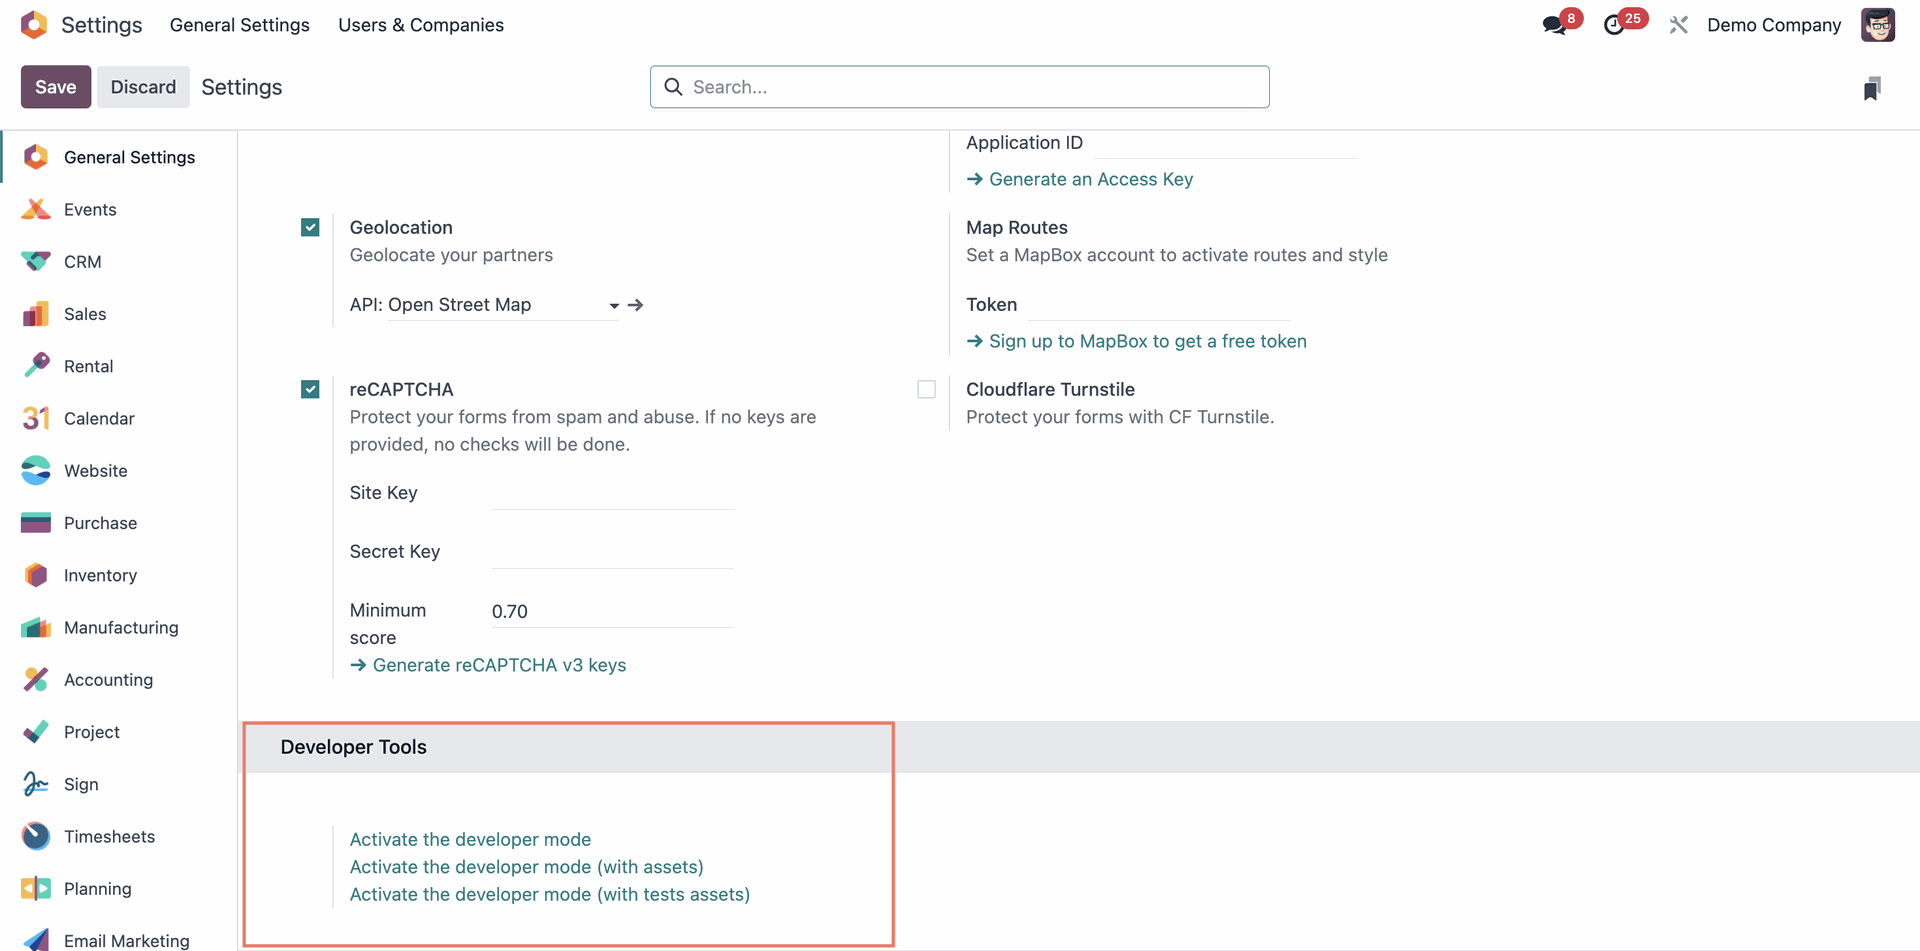
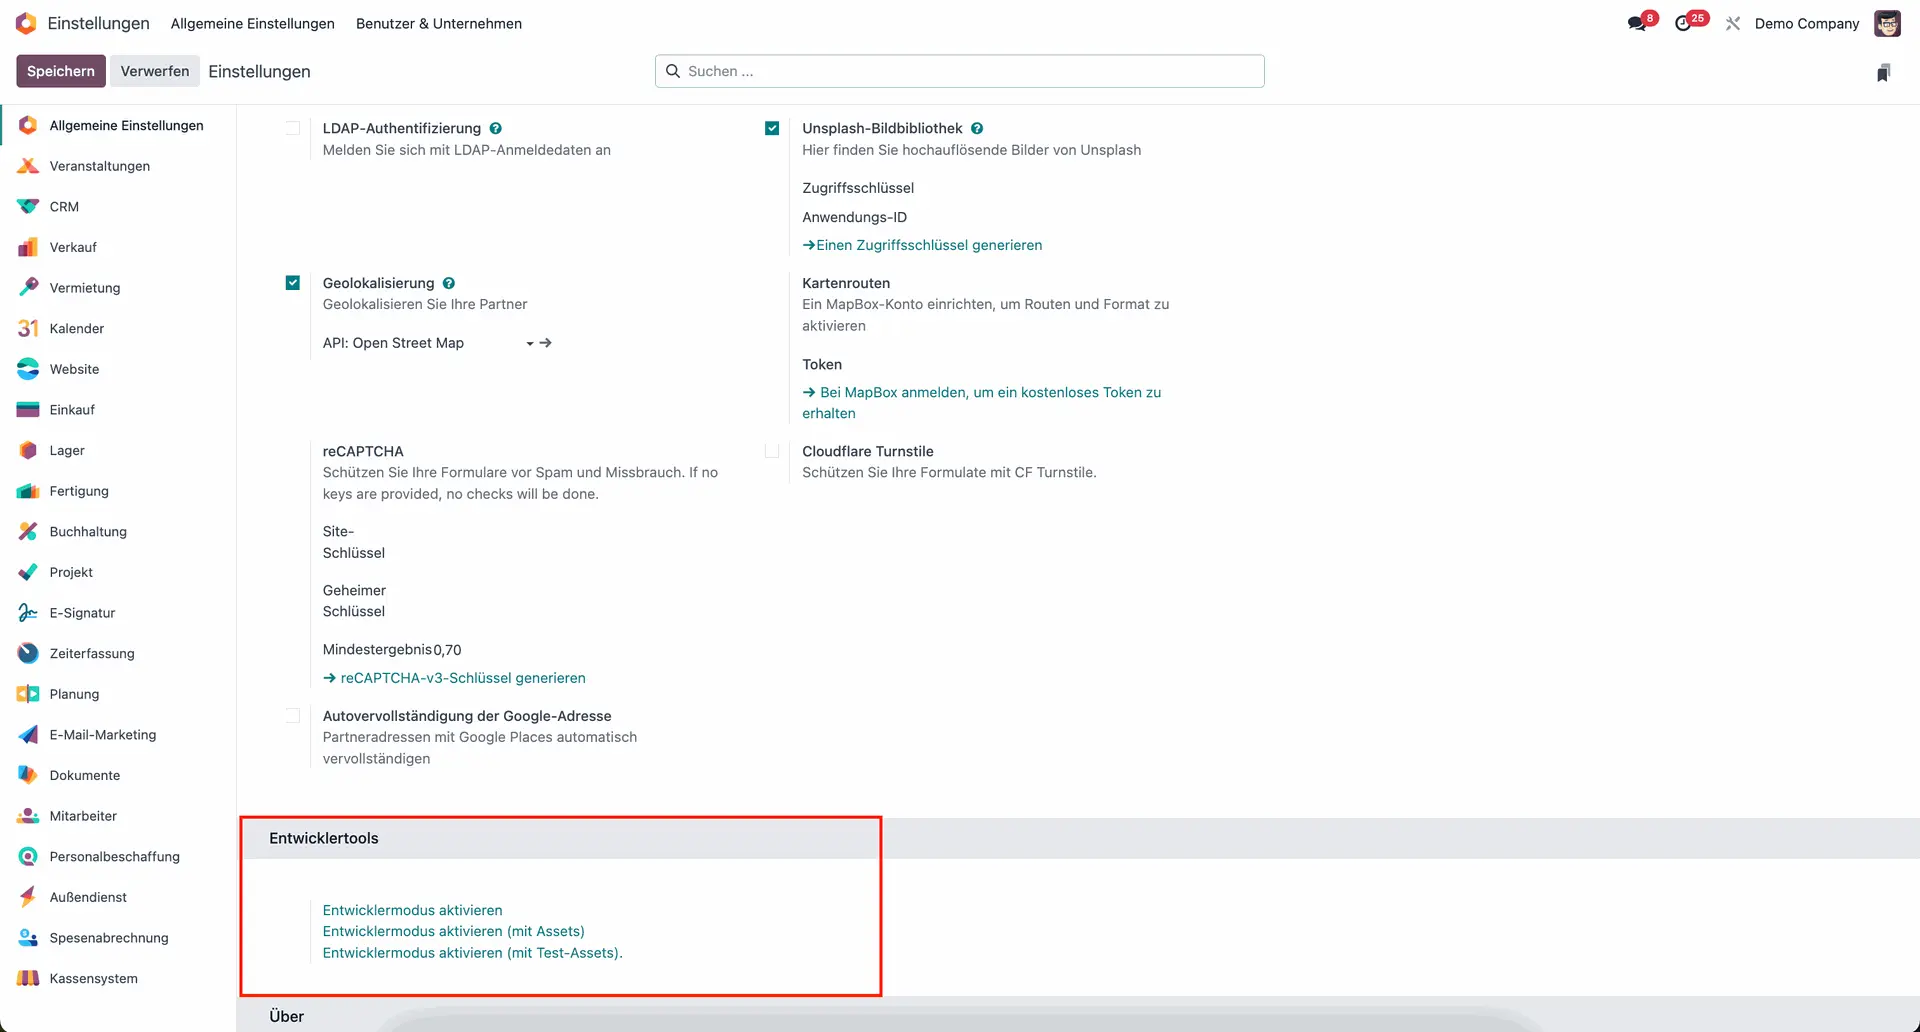
Go to your Odoo Settings app. Scroll down to Developer Tools and click on Activate developer mode.
Where to find Automation Rules in Odoo 18
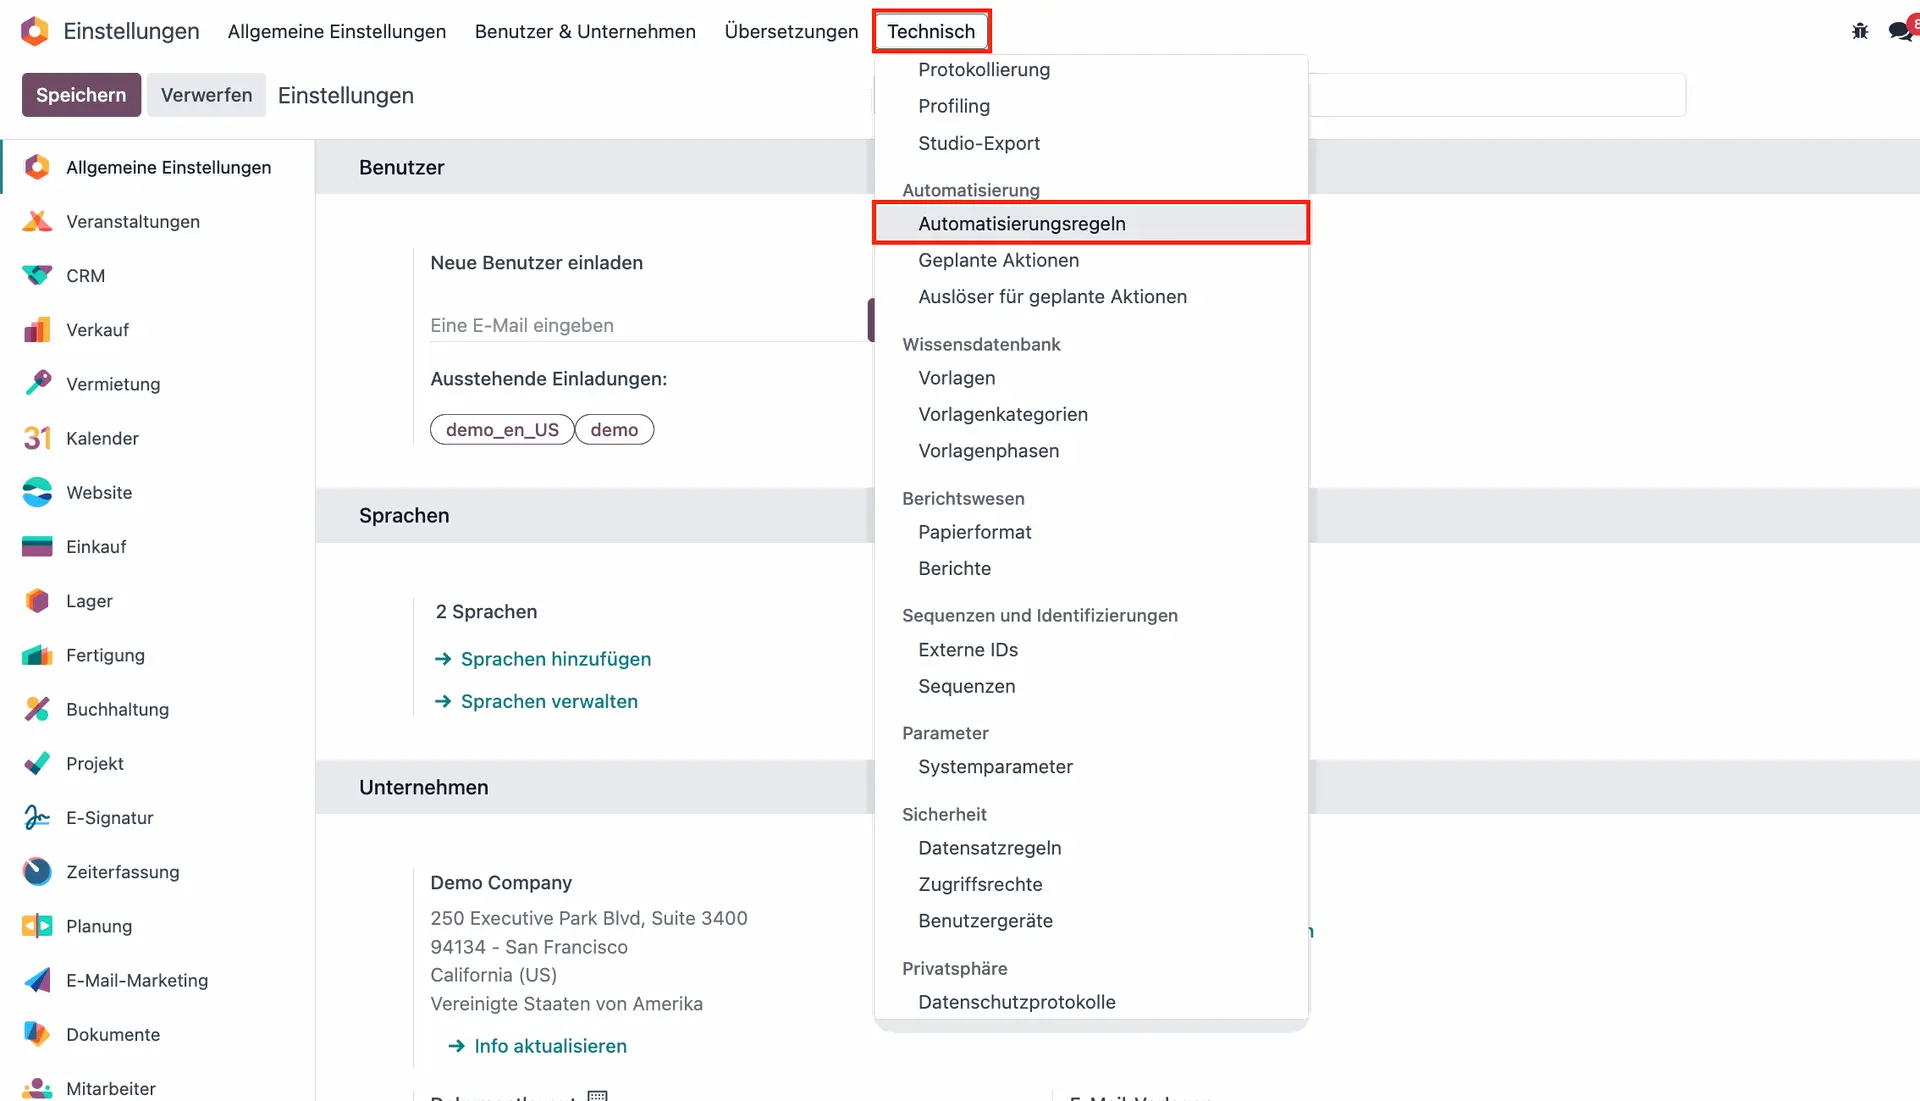
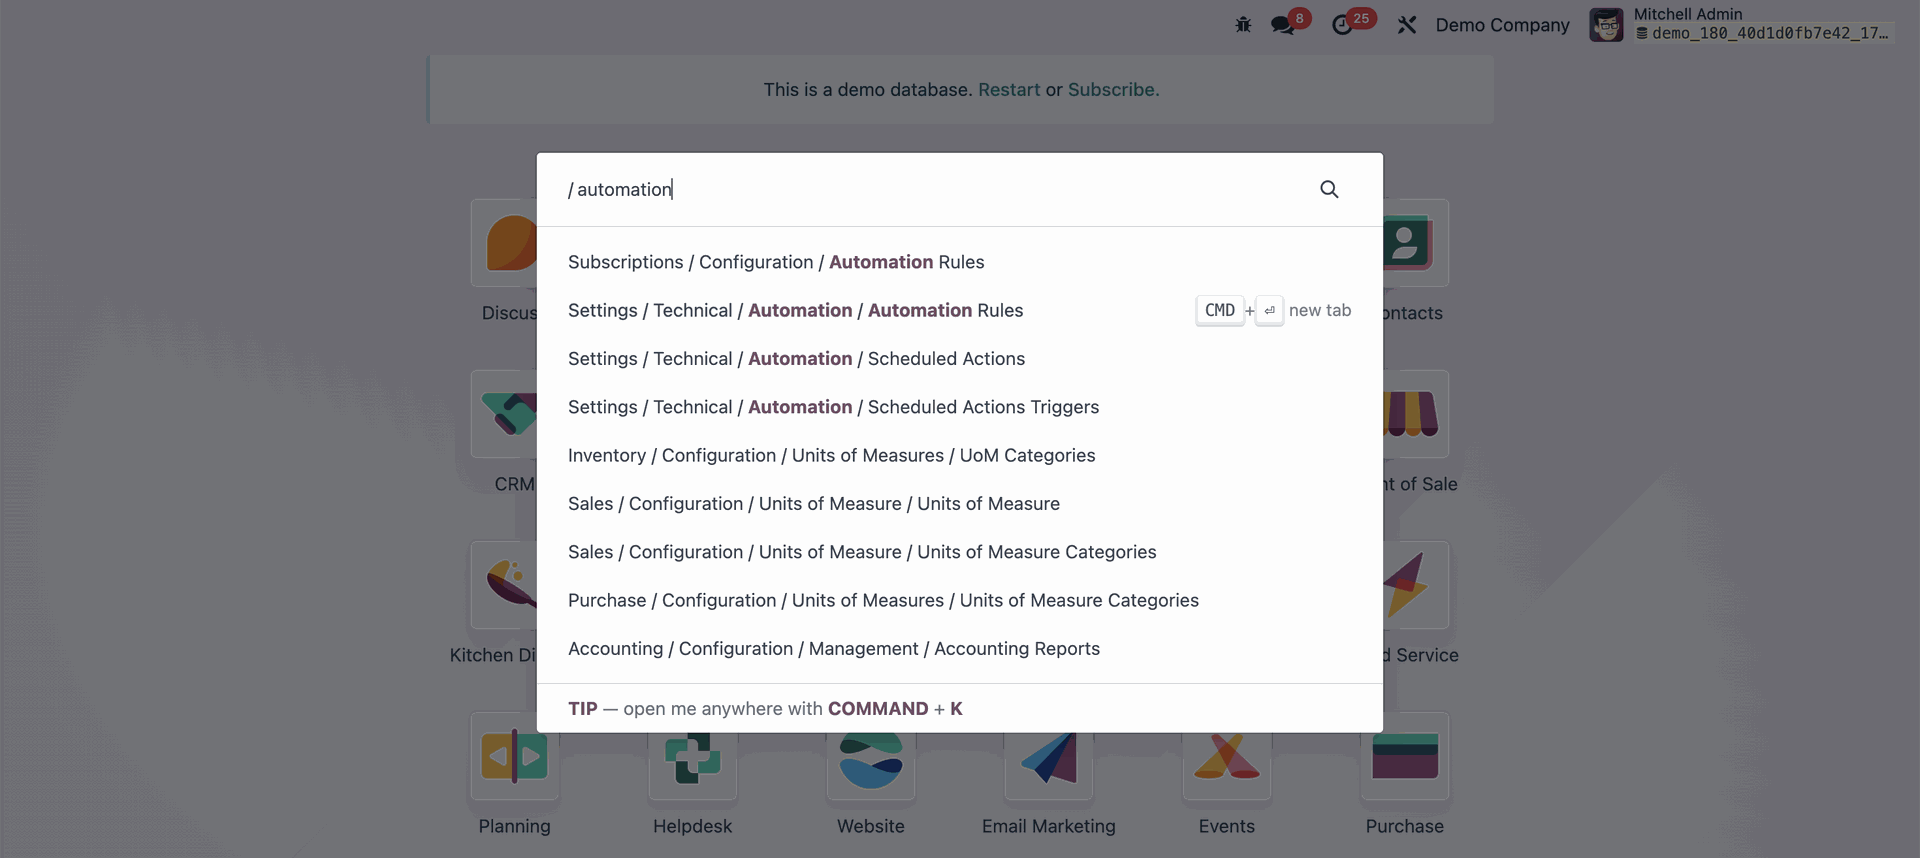
Once you have enabled Developer Mode, the Automation Rules feature will now be visible to you. To access it, you can either:
- Go to the Settings app and click on the Technical tab Scroll top Automation → Automation Rules

- Search for Automation Rules in your Odoo home screen by using the / command.

How to set up automated payment notifications in Odoo 18
To enable automated payment notifications in Odoo 18, you need to create and configure an appropriate Automation Rule. Here’s how to do it:
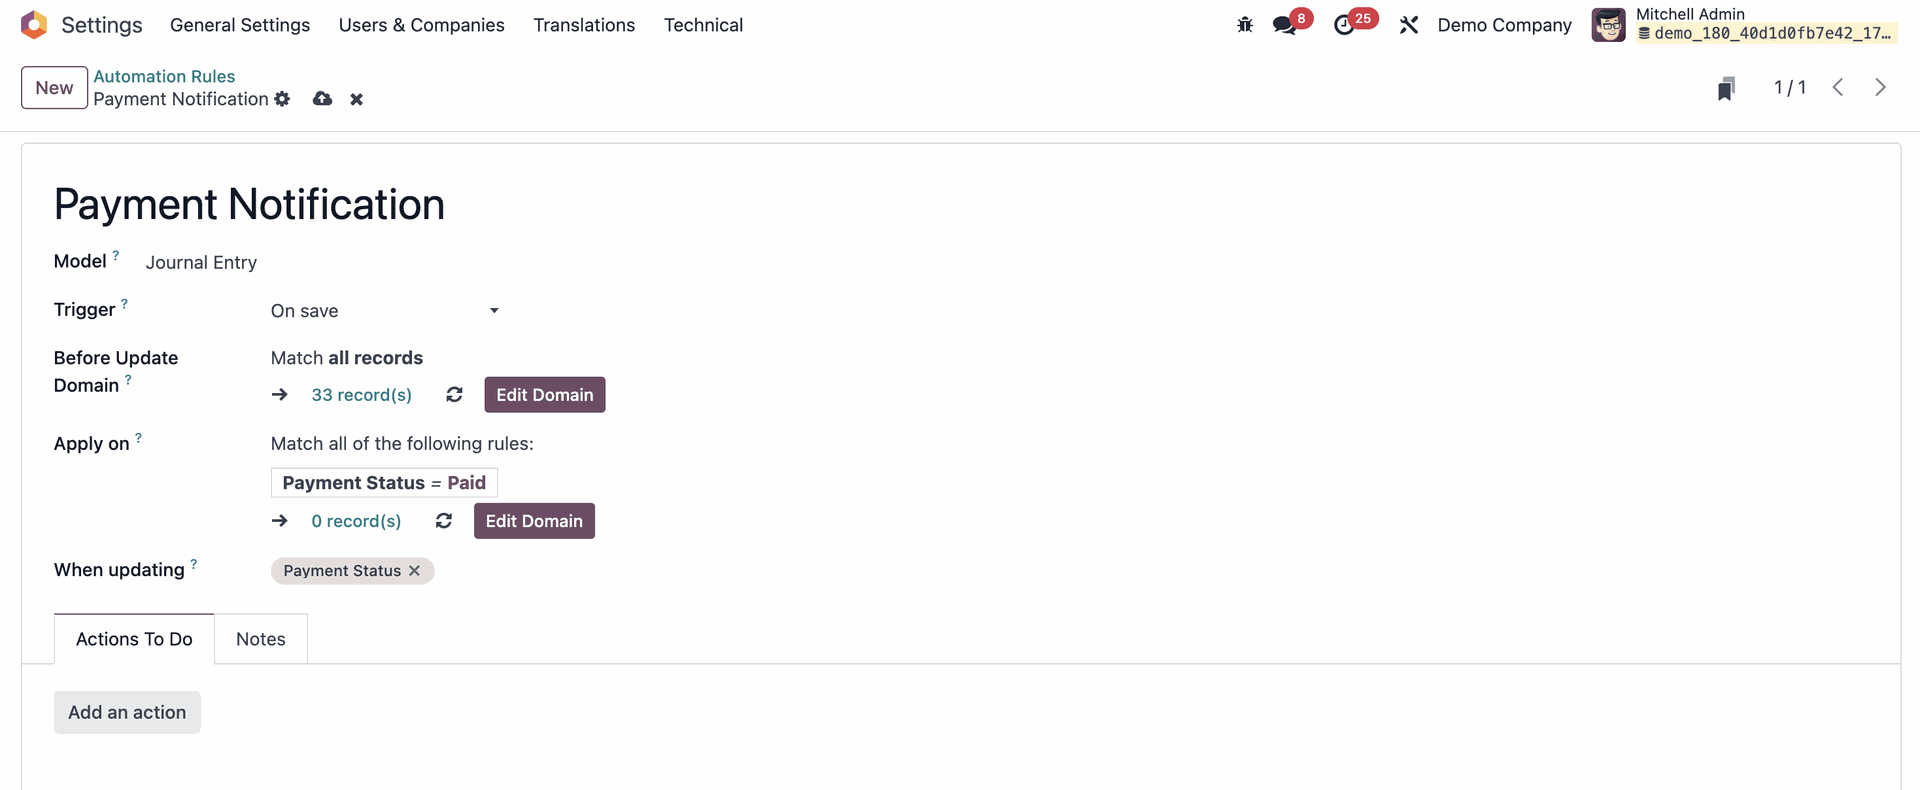
1. Create an Automation Rule with the following information:
- Model: Journal Entry
- Trigger: On save
- Apply on: Payment Status = Paid
- When updating: Payment Status

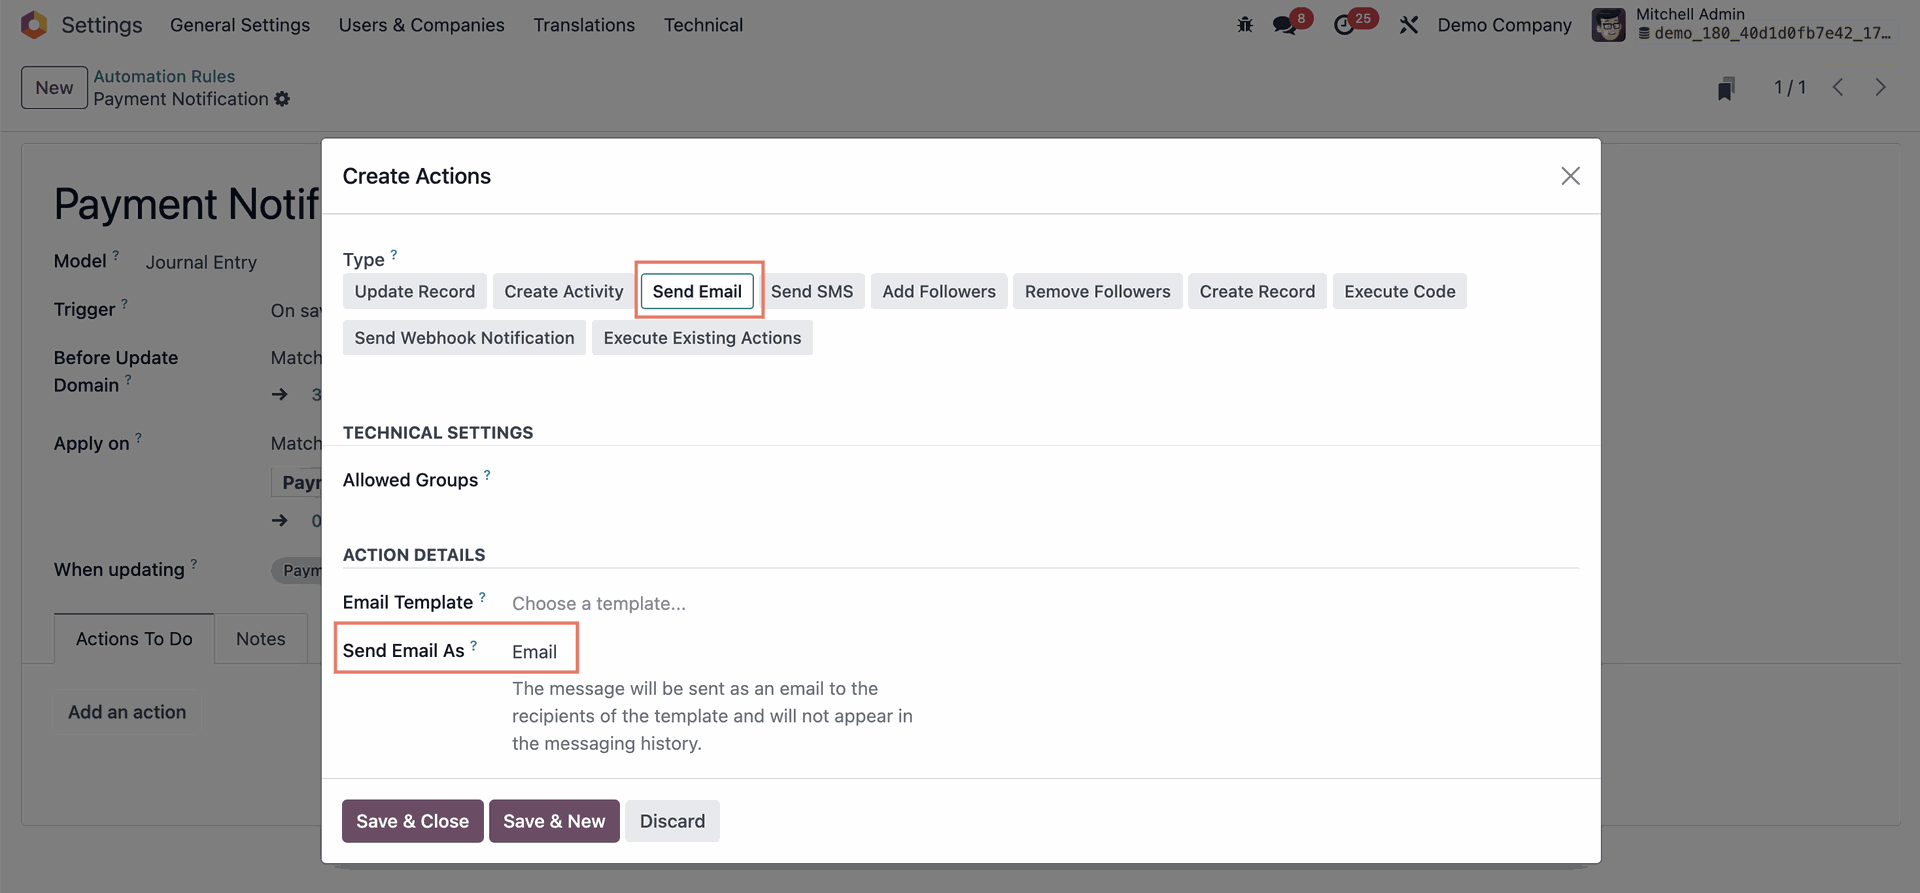
2. Click on the Add an action button, which will open a pop-up. There, you will select the following:
- Type: Send an email
- Send email as: Email
3. Select an email to send from an existing template or create a new one directly from this window.
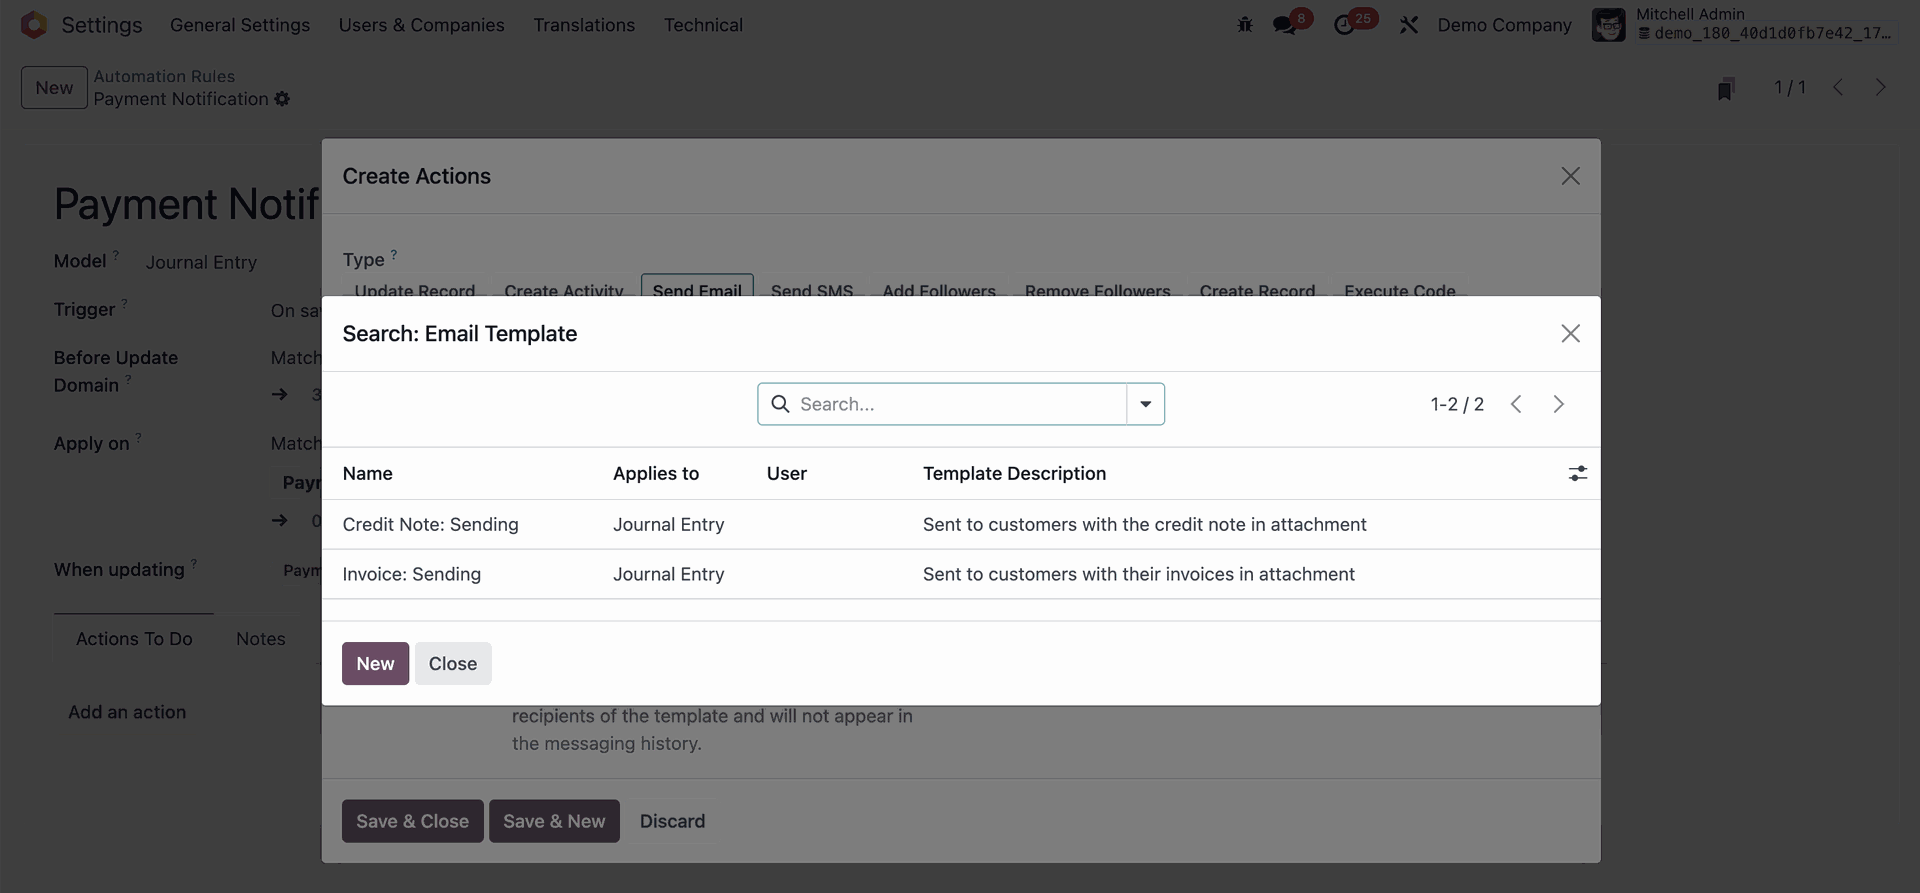
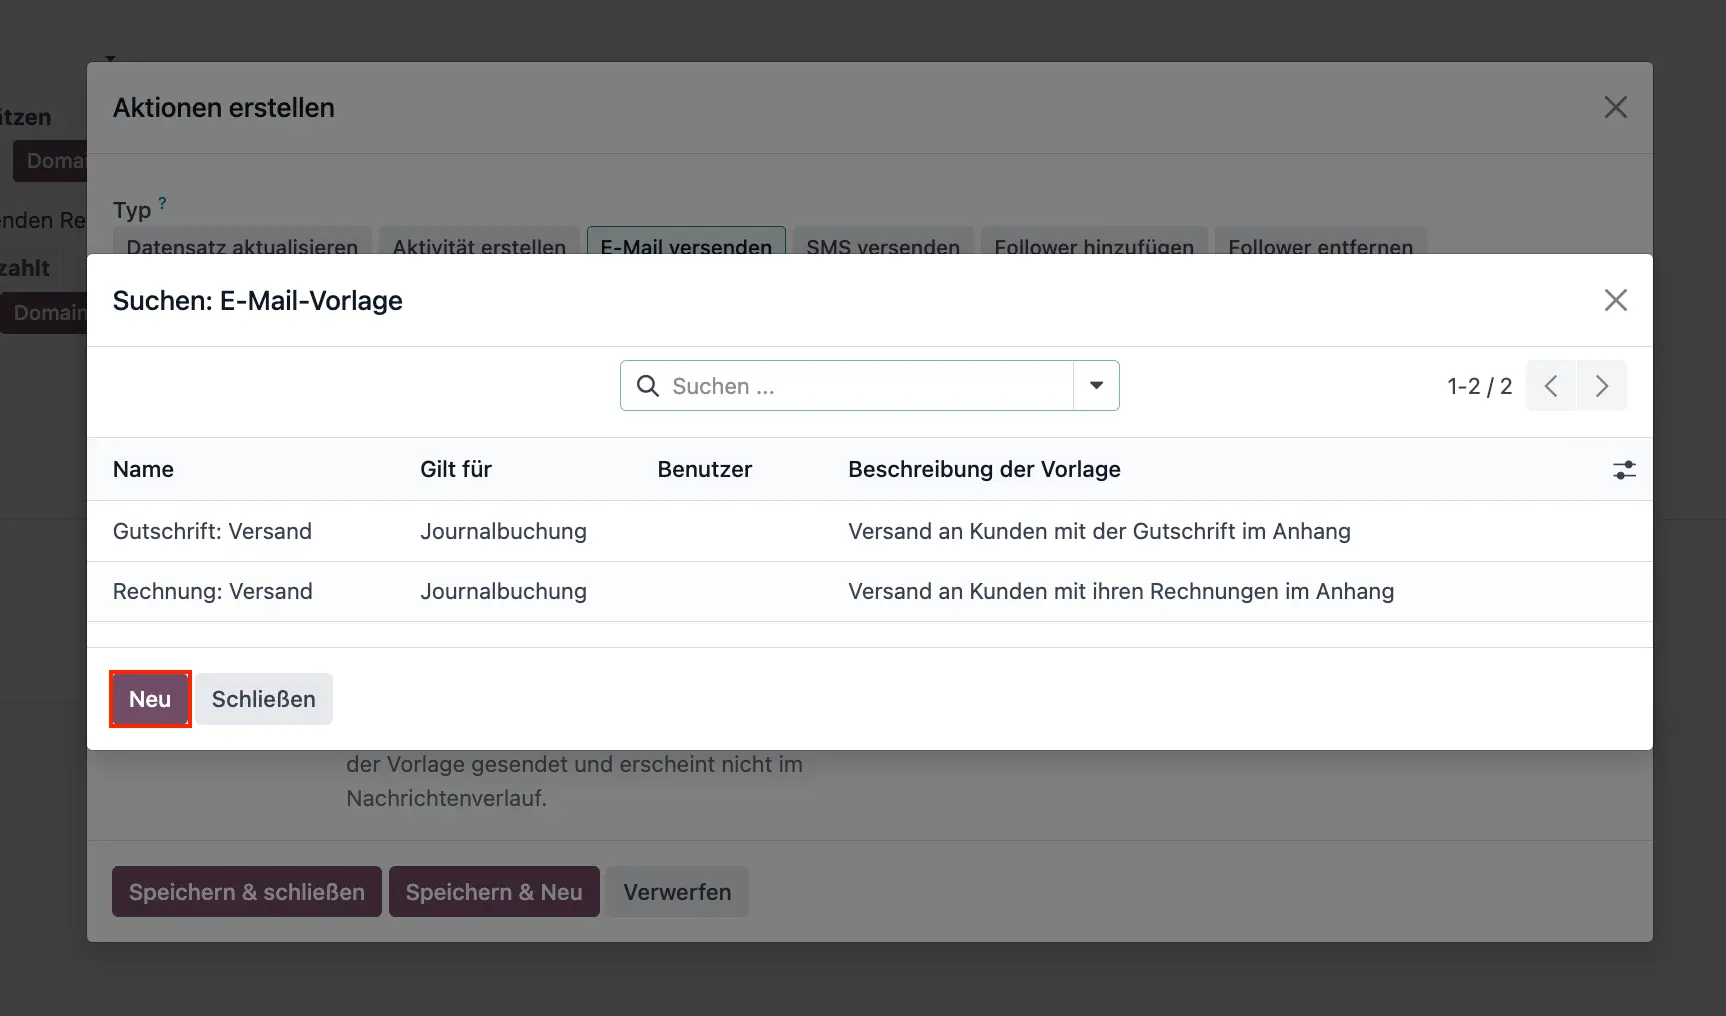
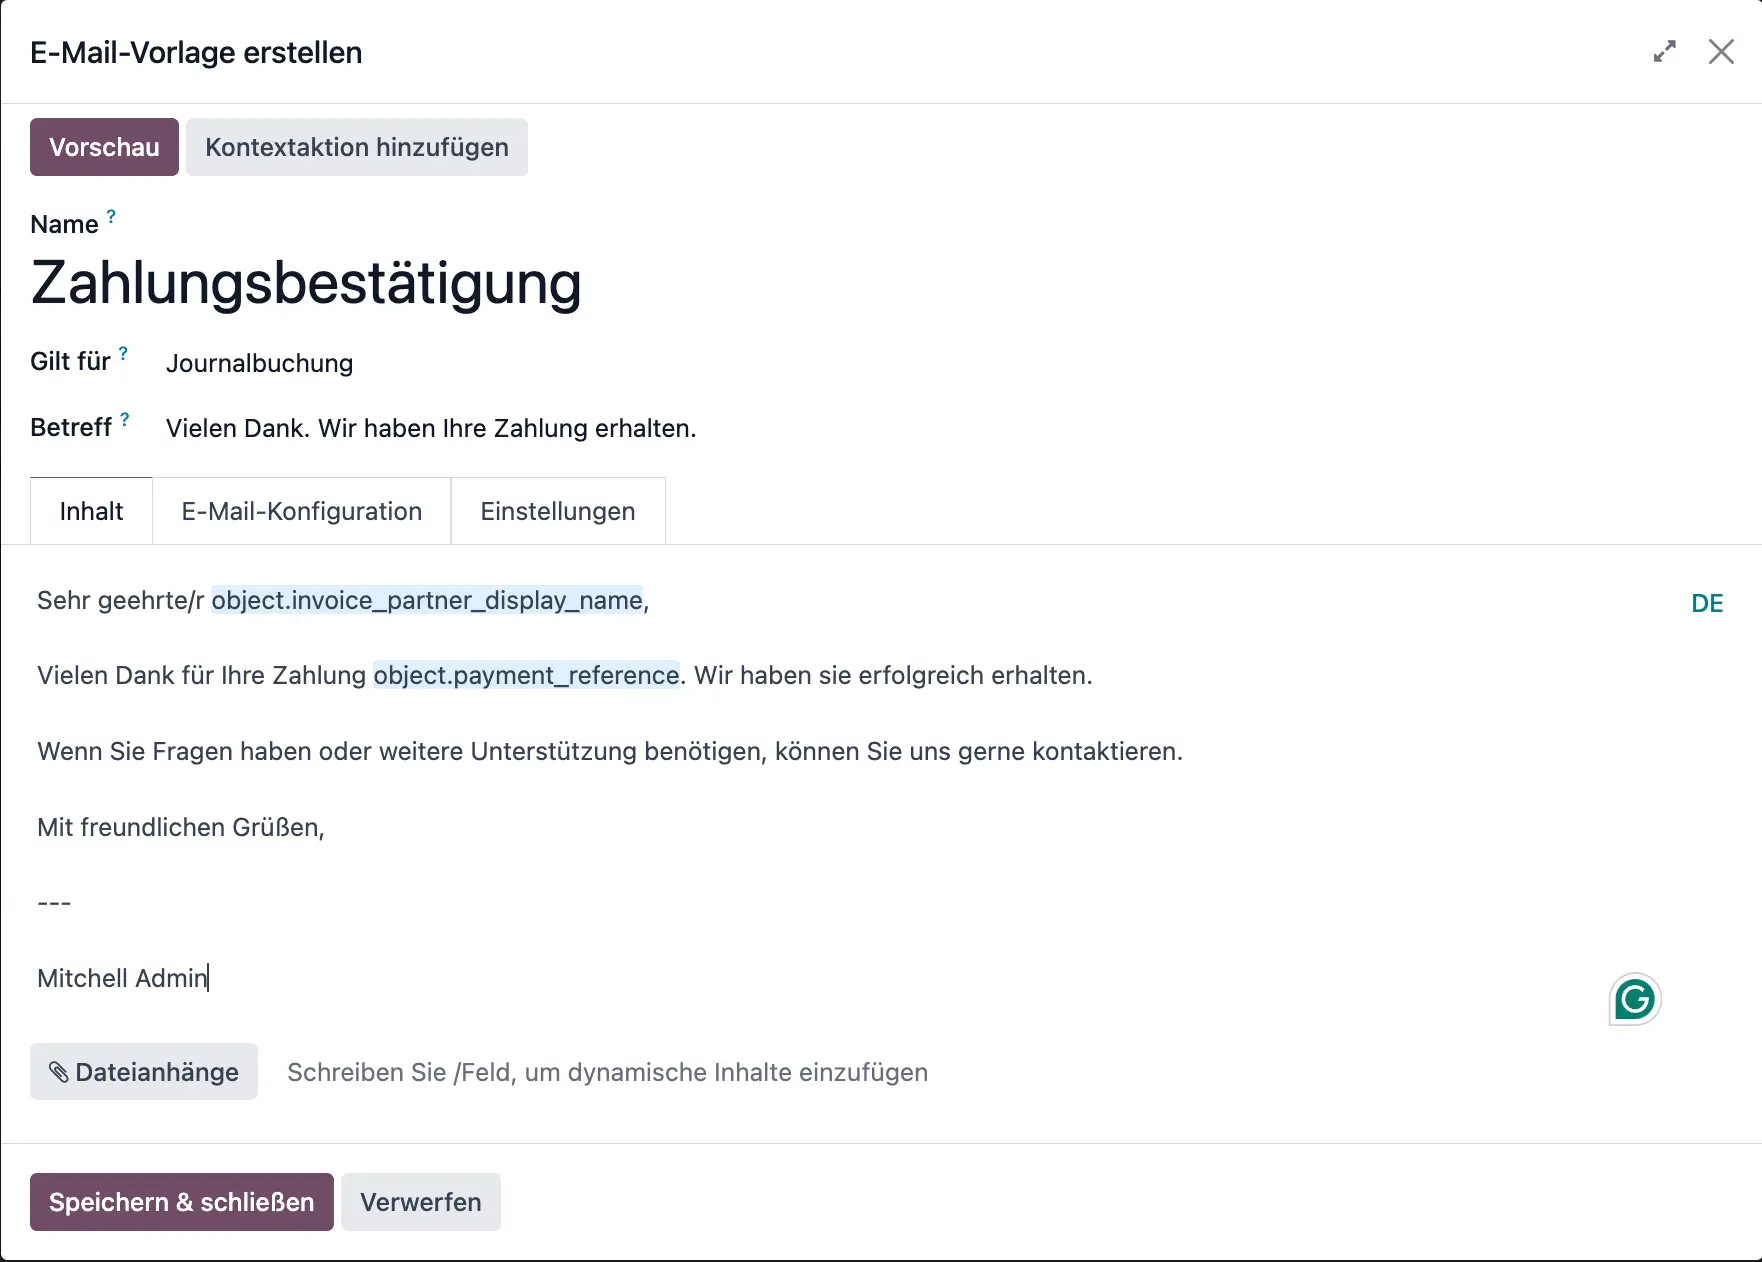
You can do this by clicking on the dropdown menu next to the Email Template field and selecting Search More…, and adding a new template when prompted. Fill out your new email template and save.
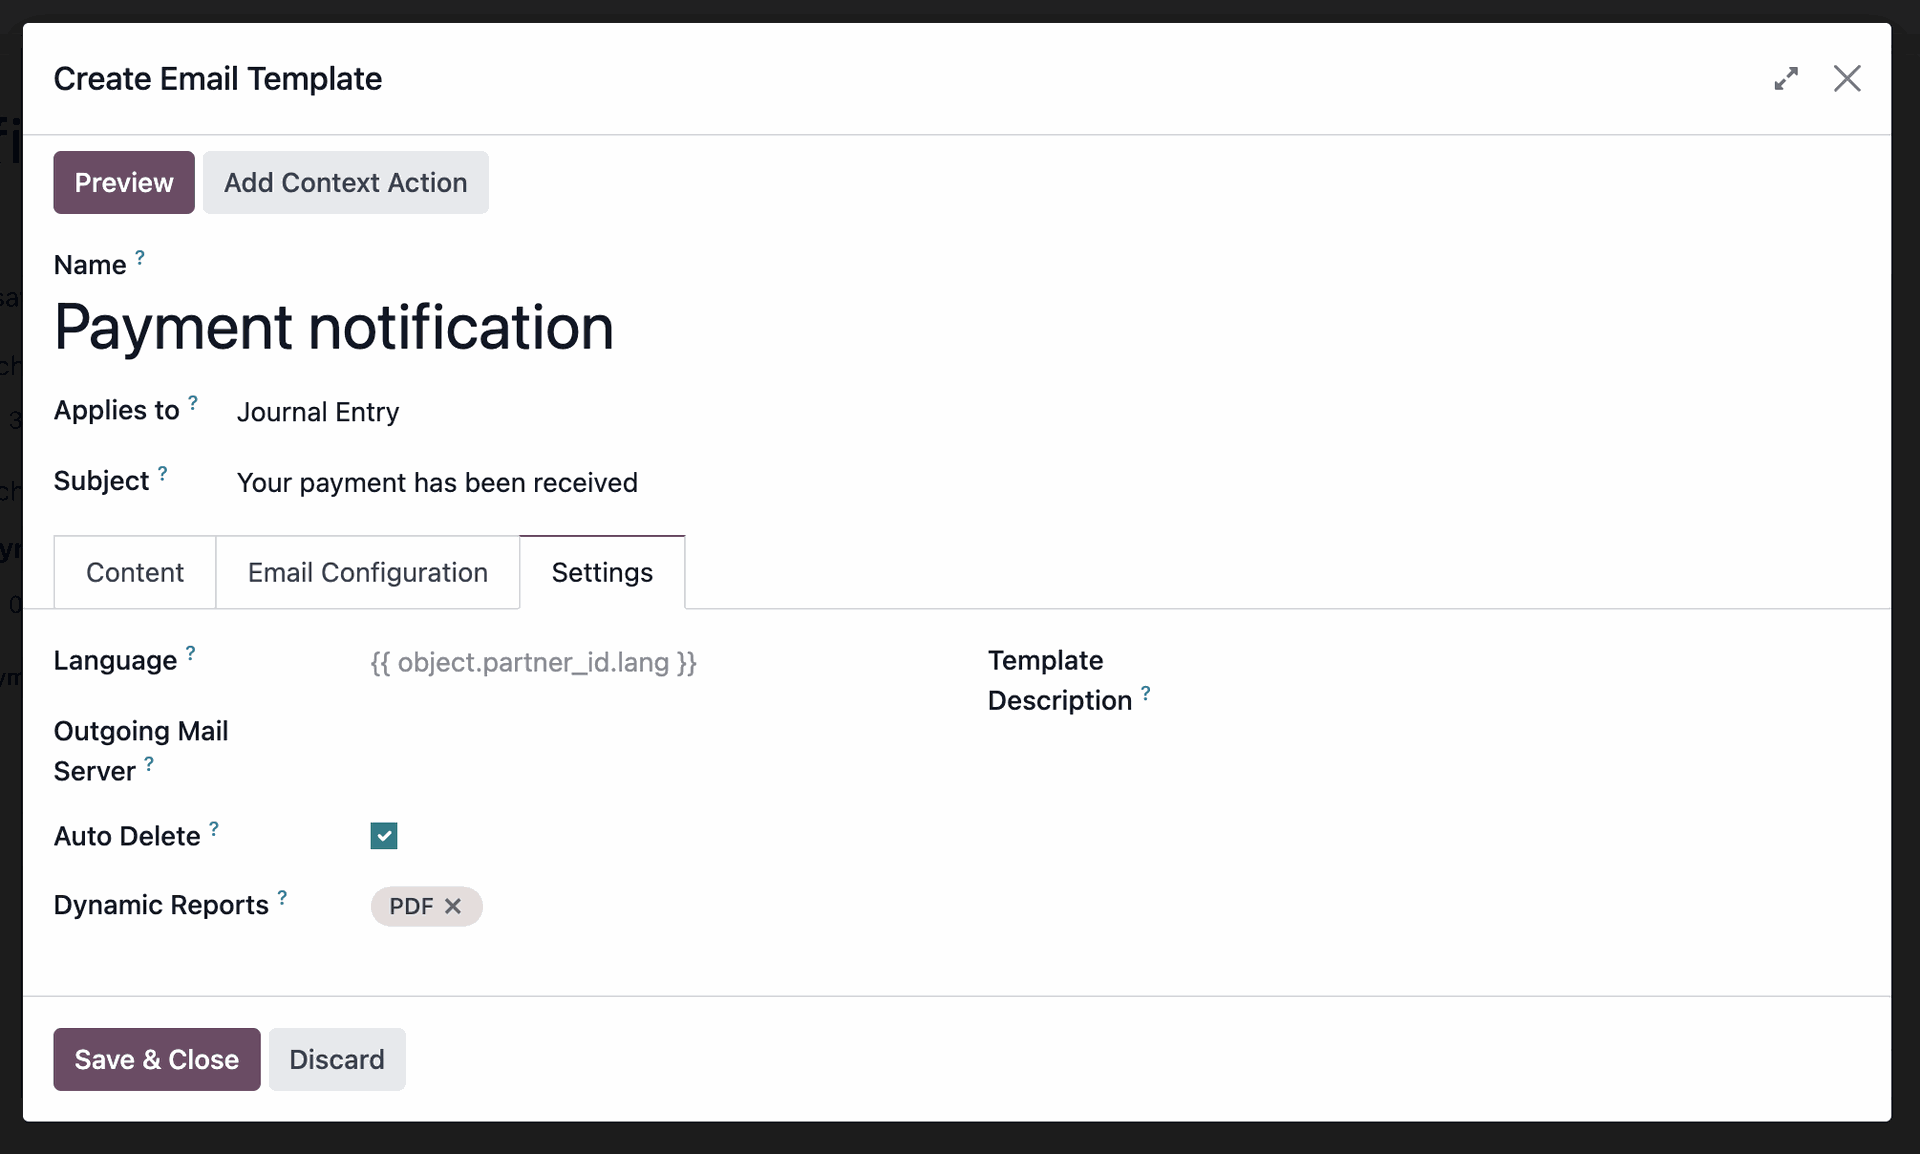
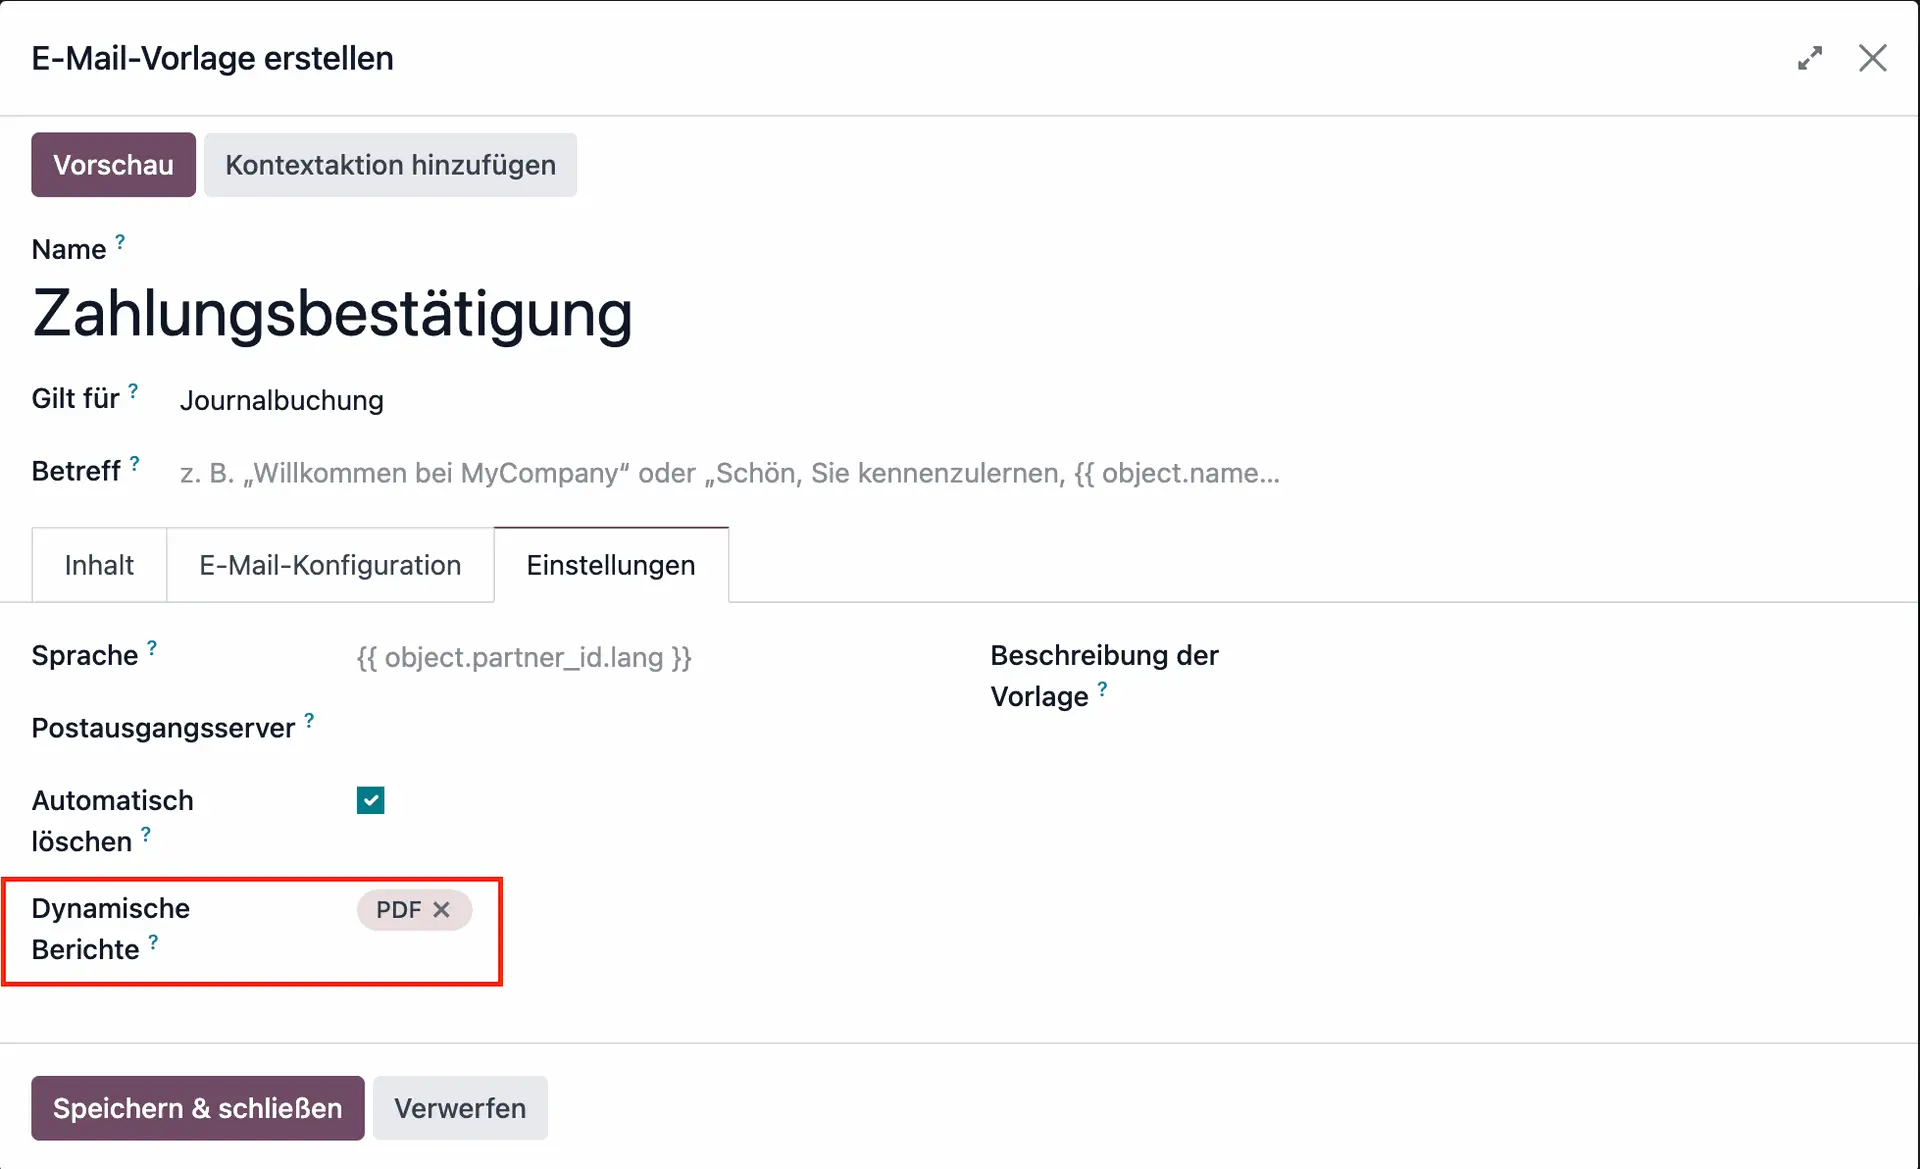
You can add fields to further automate your emailing, like Dynamic Placeholders for customer names and payment references, or even Dynamic Reports like invoice documents (see below)

How automated payment notifications actually work in Odoo 18
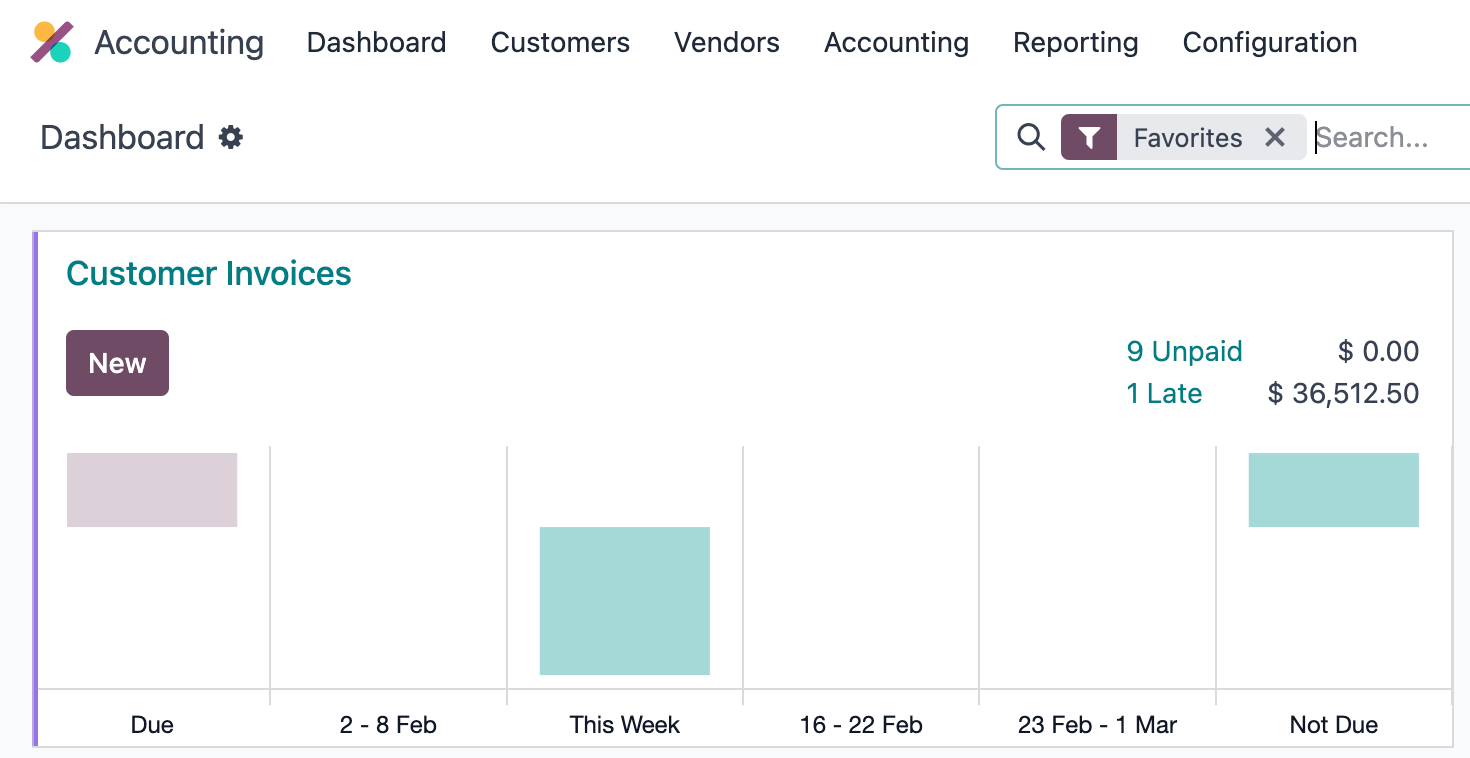
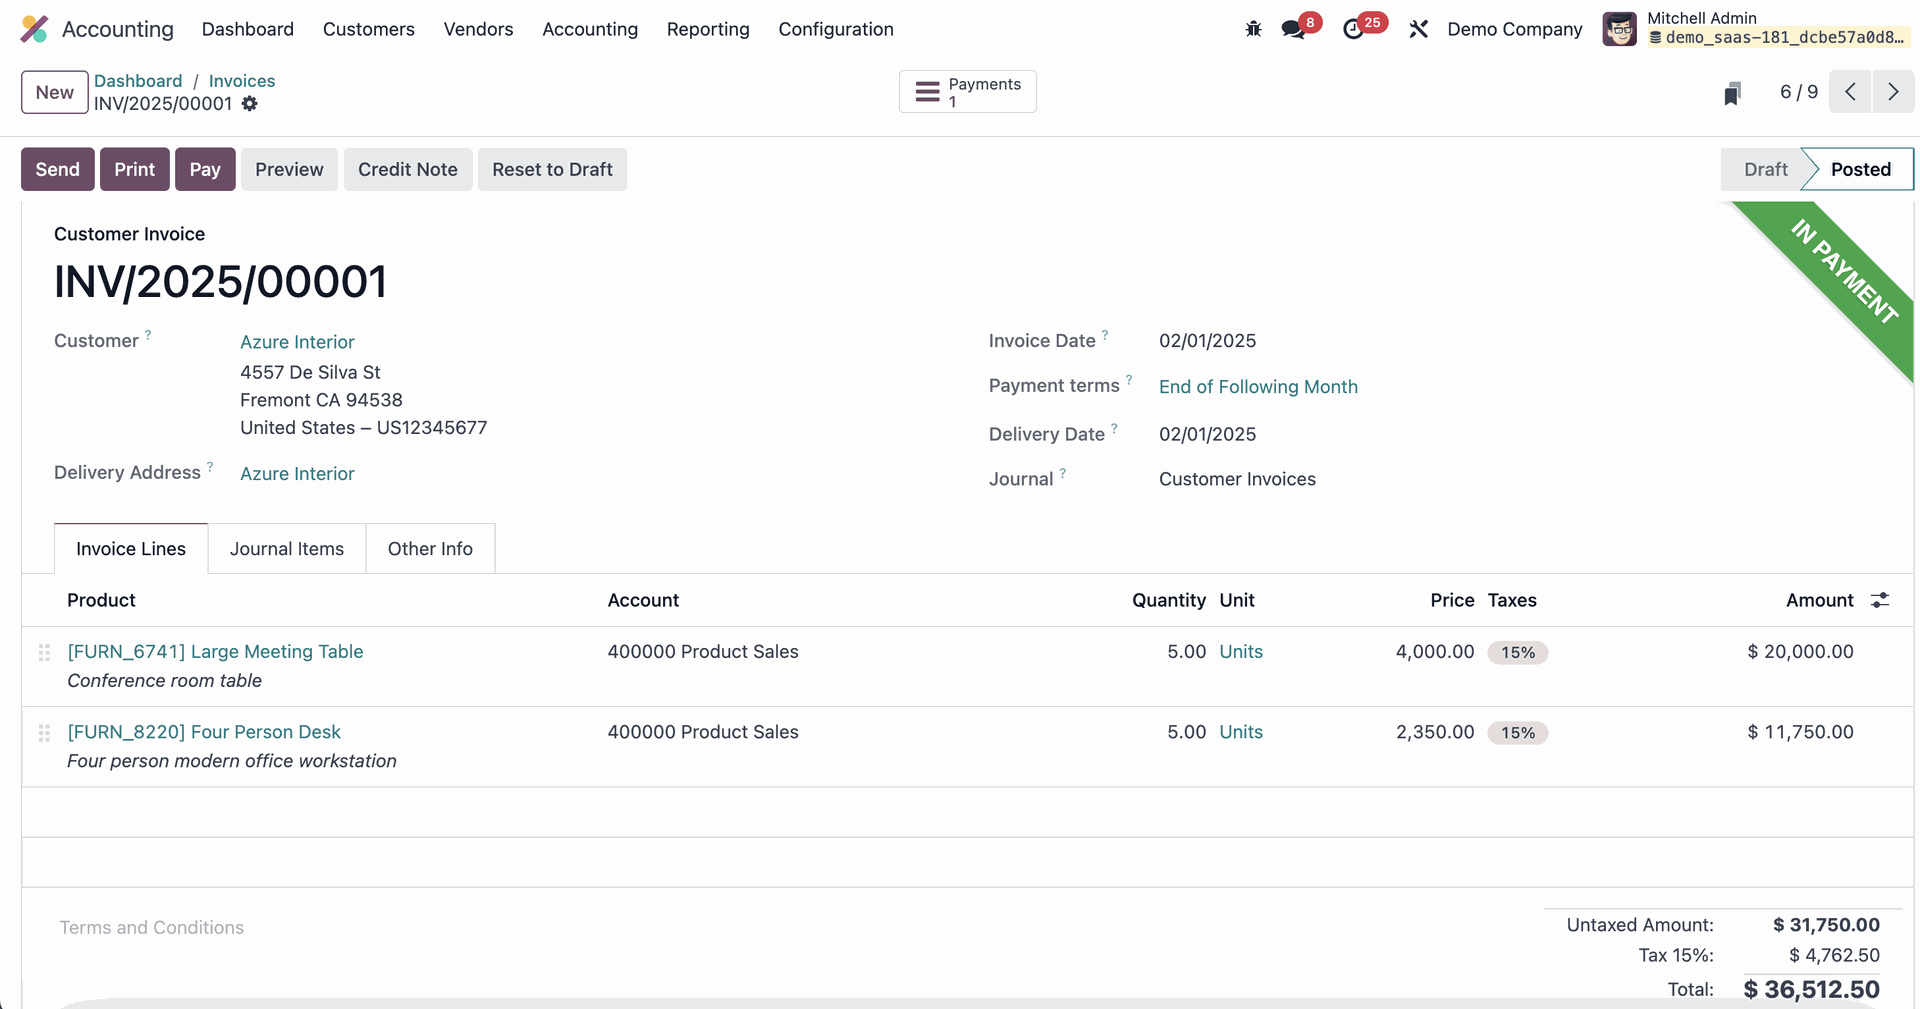
Let’s put our configuration to the test. To do so, navigate to the Accounting app and assume we have 9 unpaid invoices.
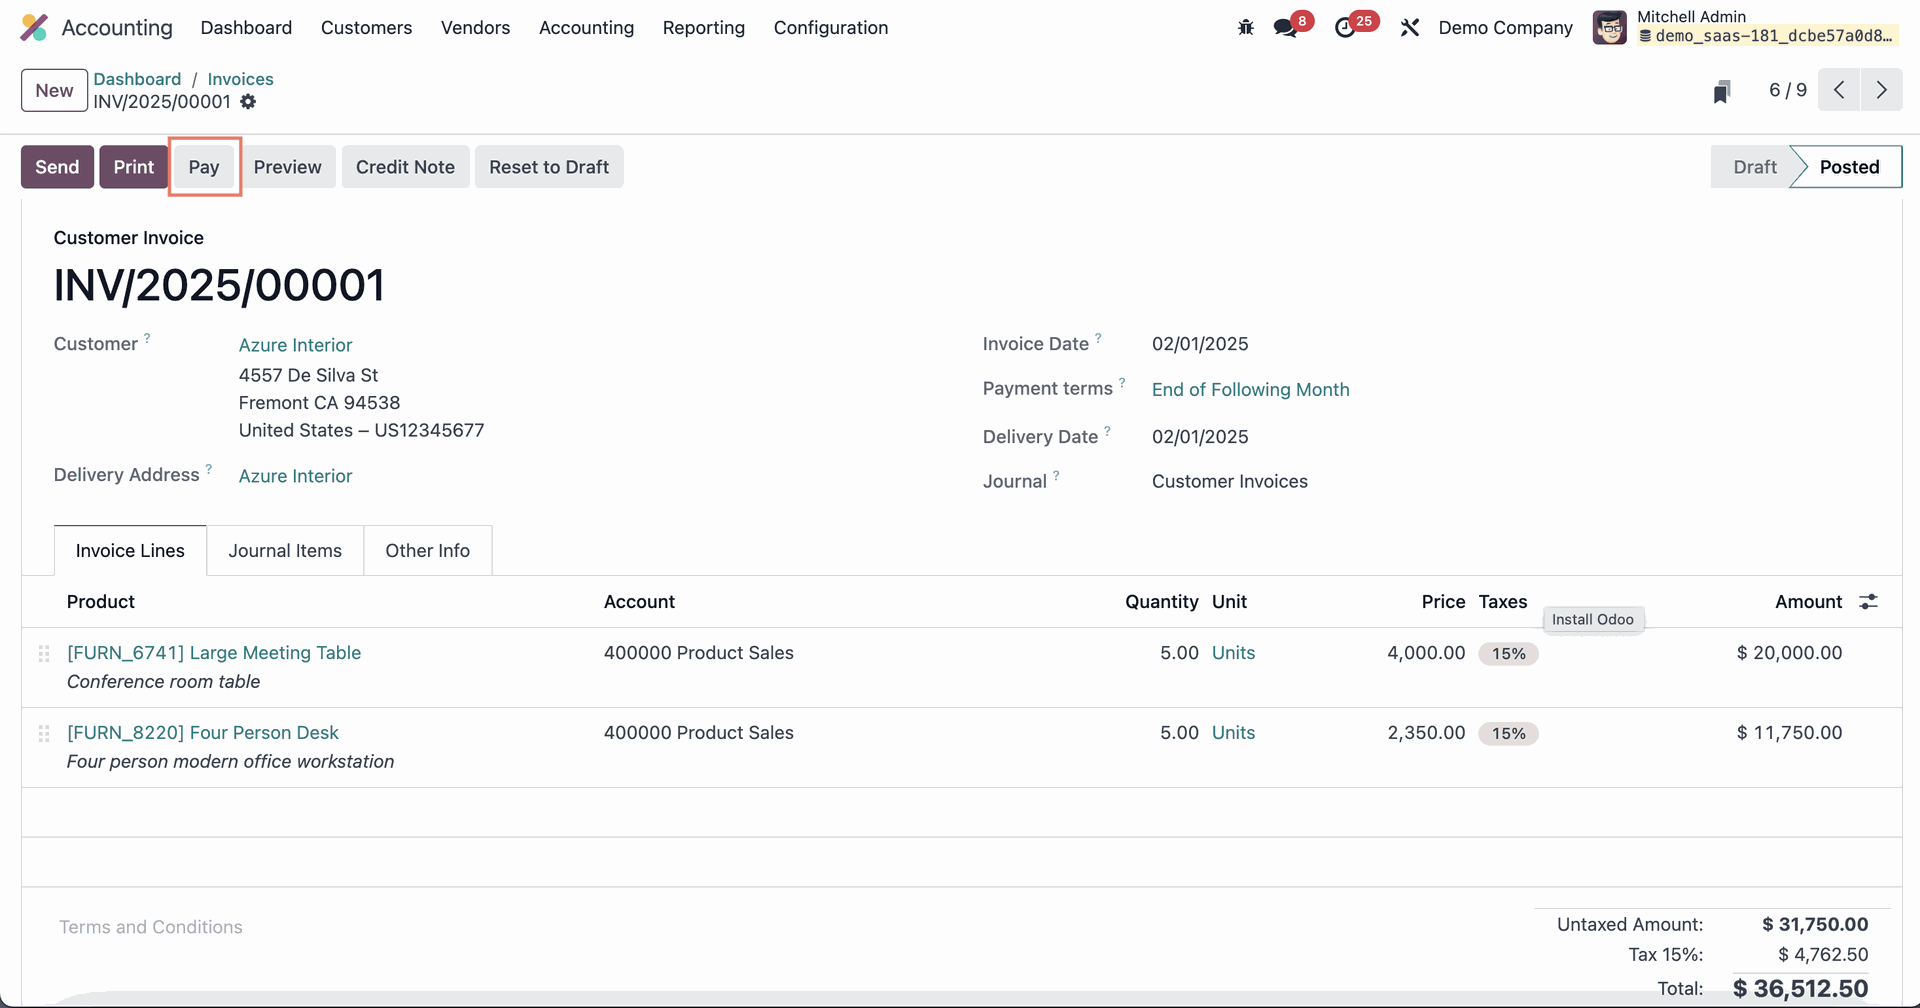
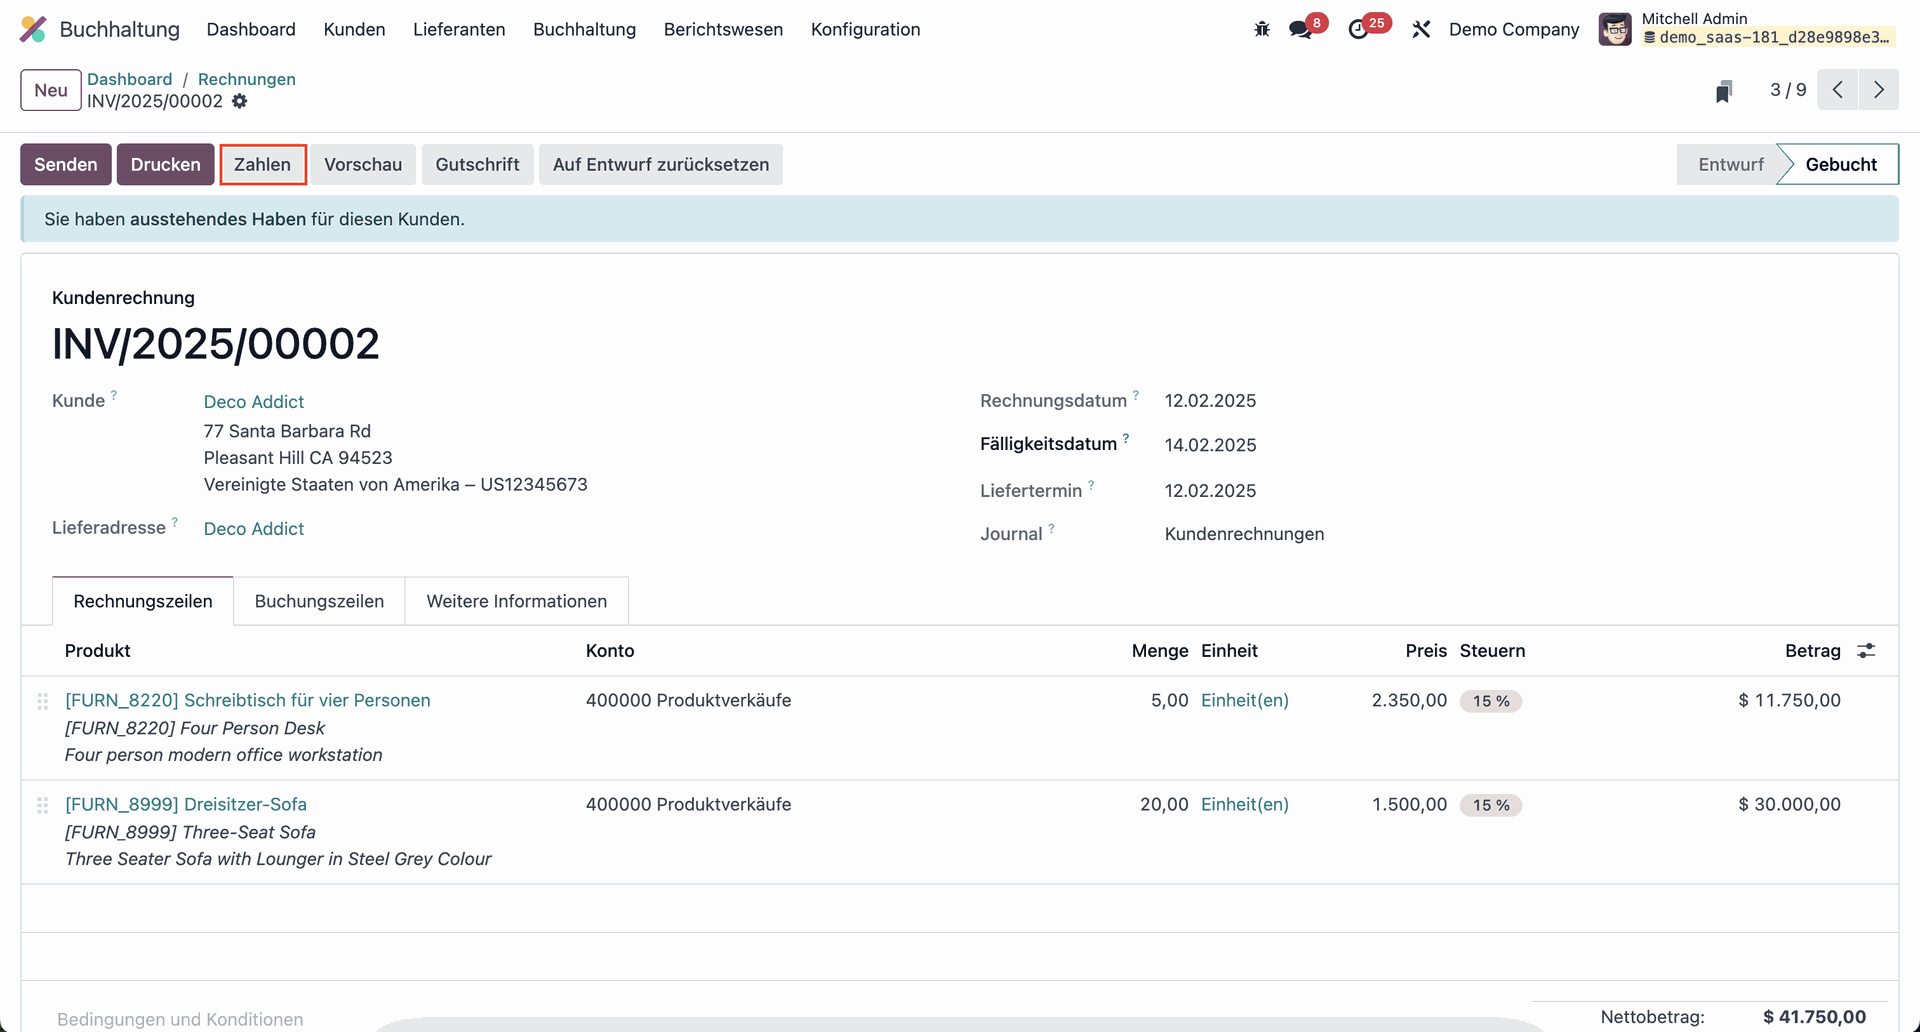
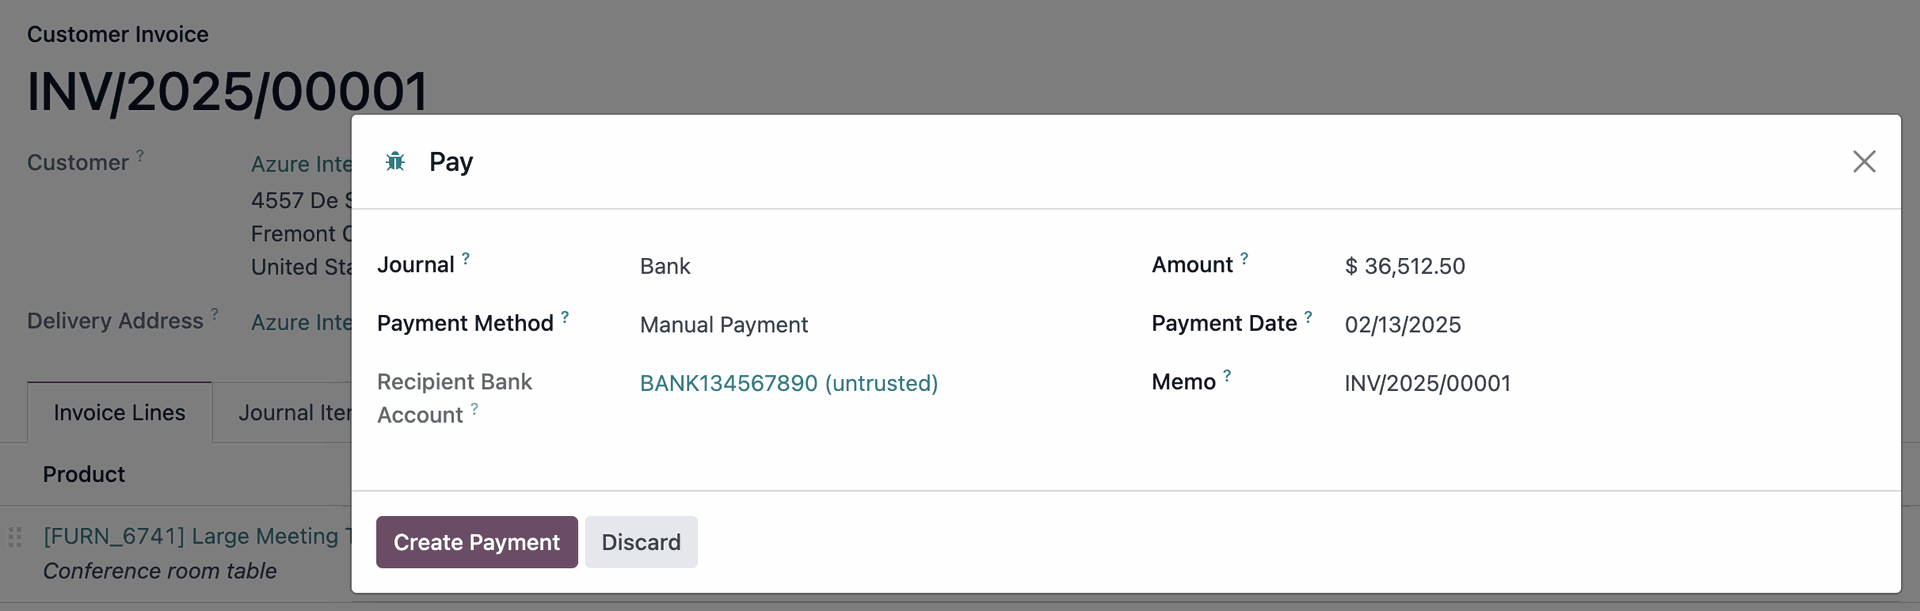
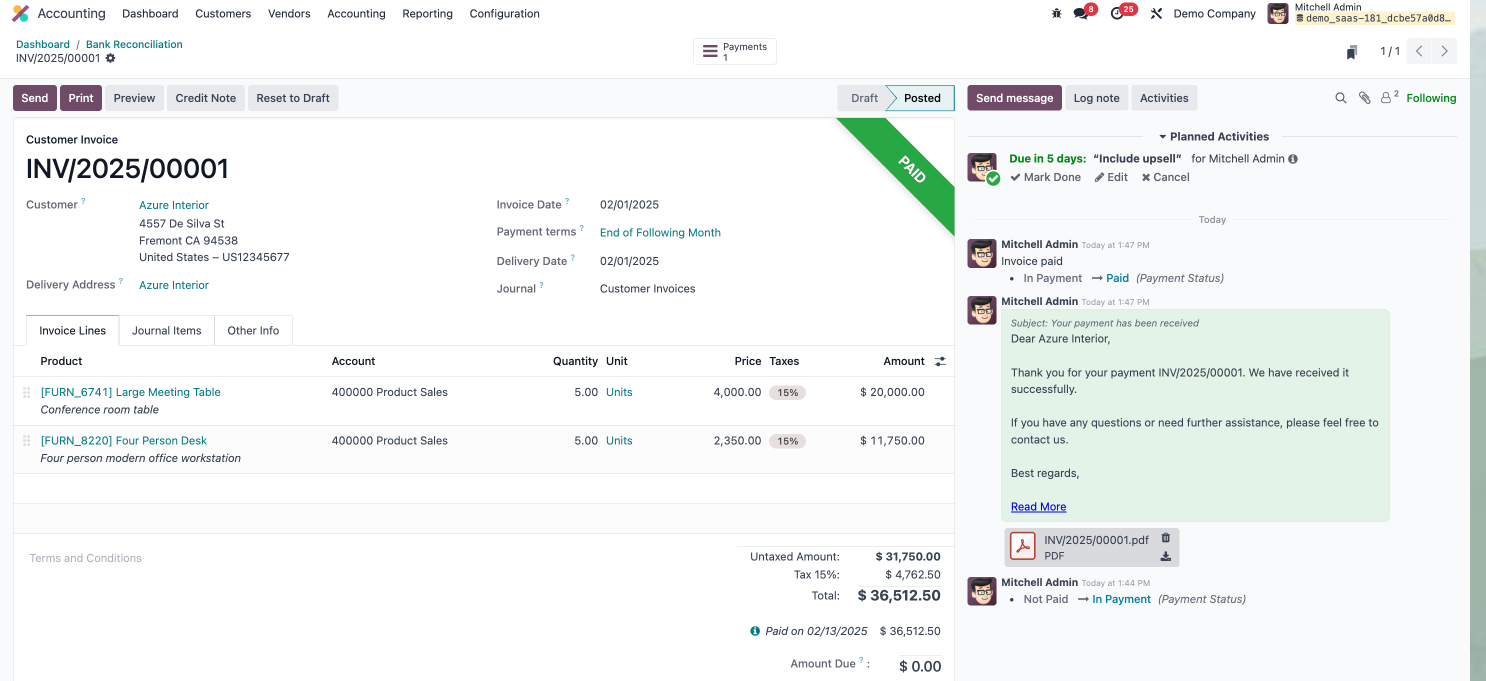
Select an unpaid invoice to process, we will go with INV/2025/00001. Then, click on the Pay button to be redirected to a pop-up.
Confirm by clicking on Create Payment
Your invoice will now be marked as In Payment and it’s ready to be reconciled.
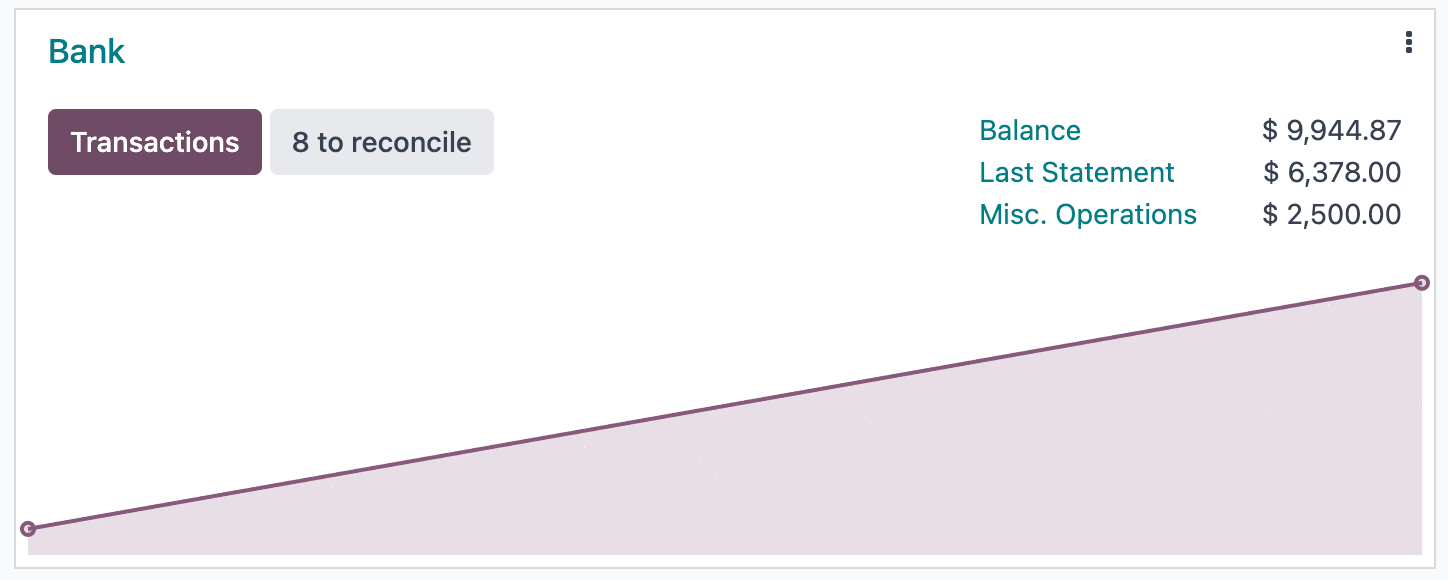
Return to the Accounting app dashboard. You will see that there are items waiting for payment reconciliation.
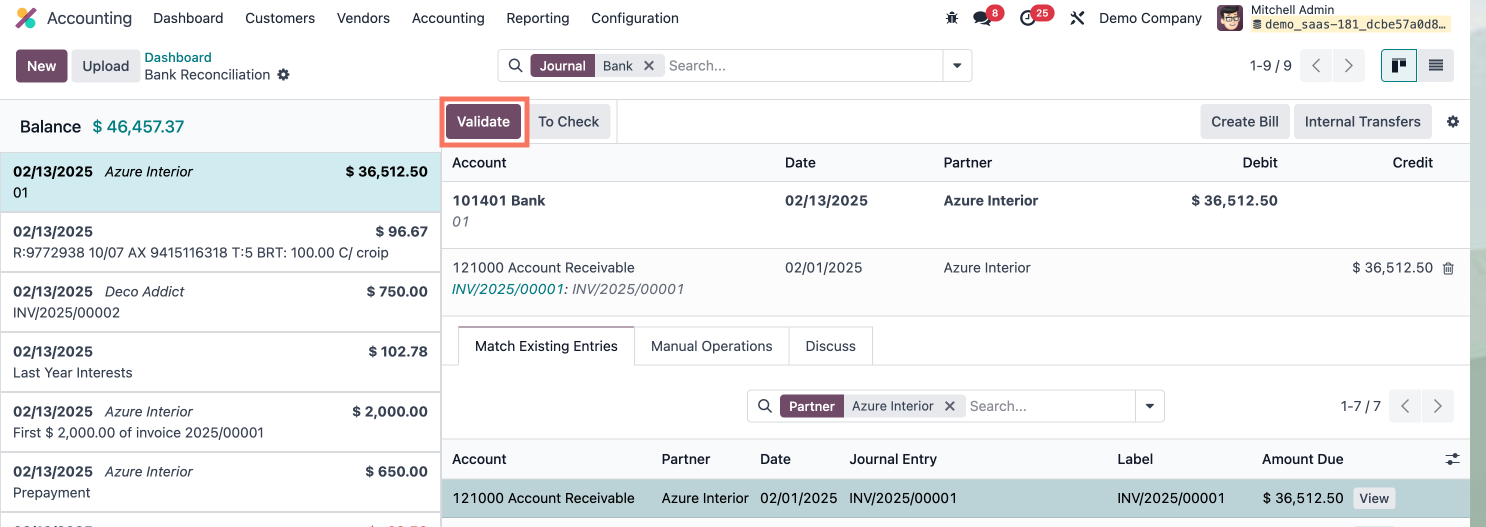
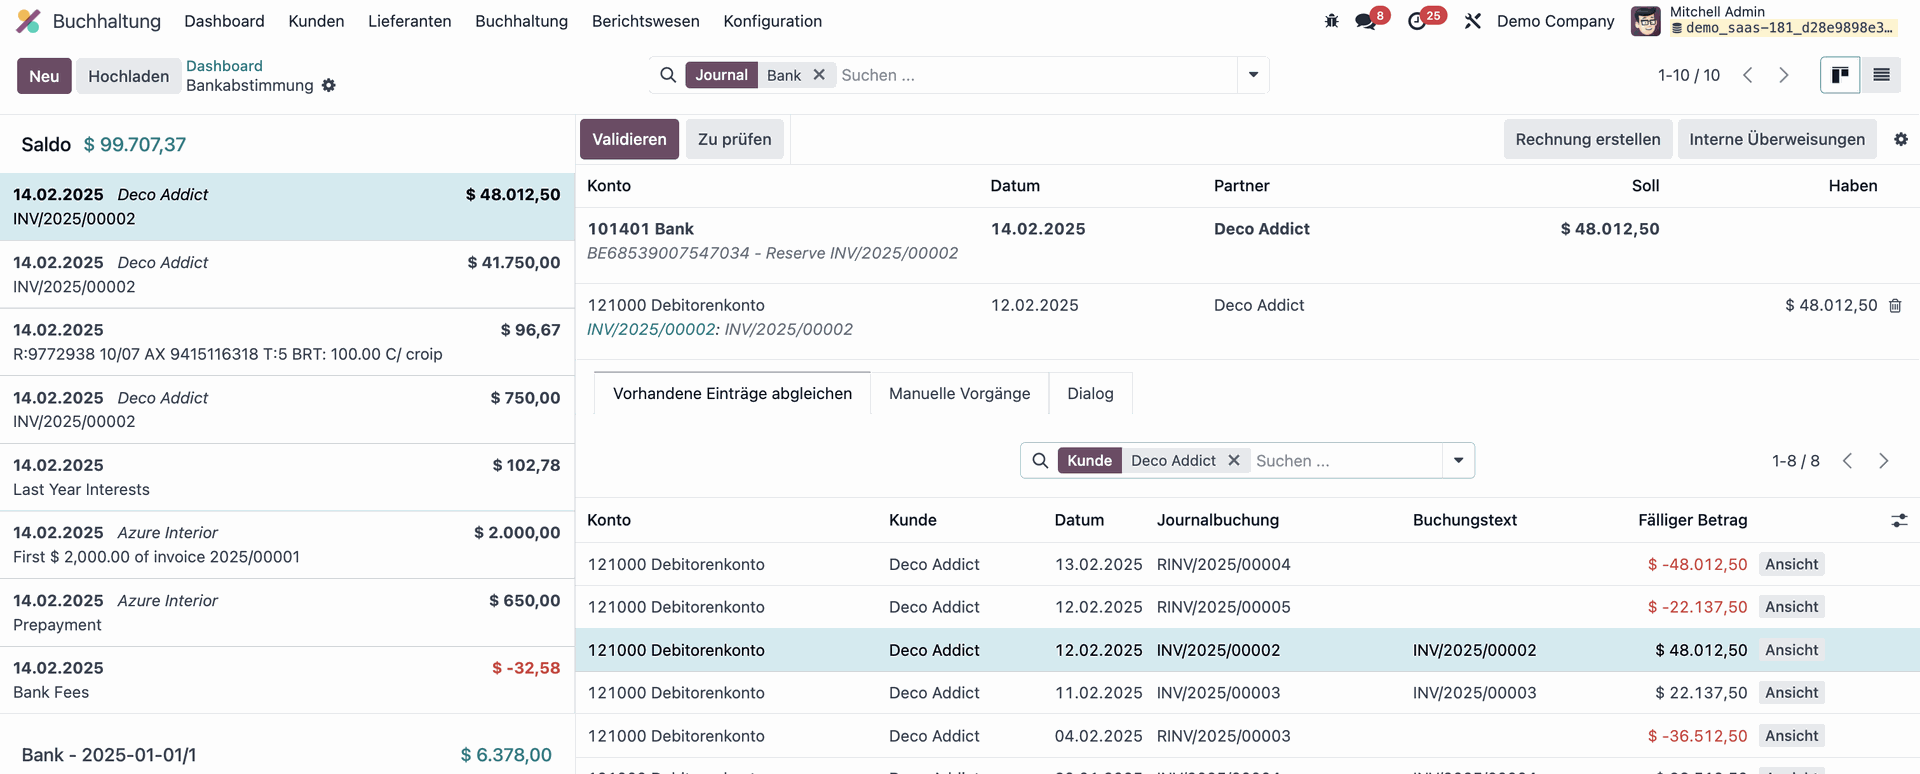
Go to Bank → Transactions and click on the New button. Add the Payment Value, Partner, and a Memo to trace back to your invoice. Then, click on Add & New.

Odoo will automatically match your invoice – you just have to Validate it.
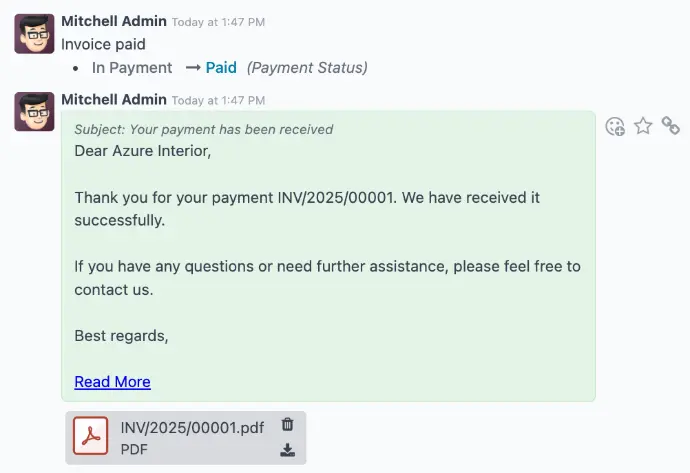
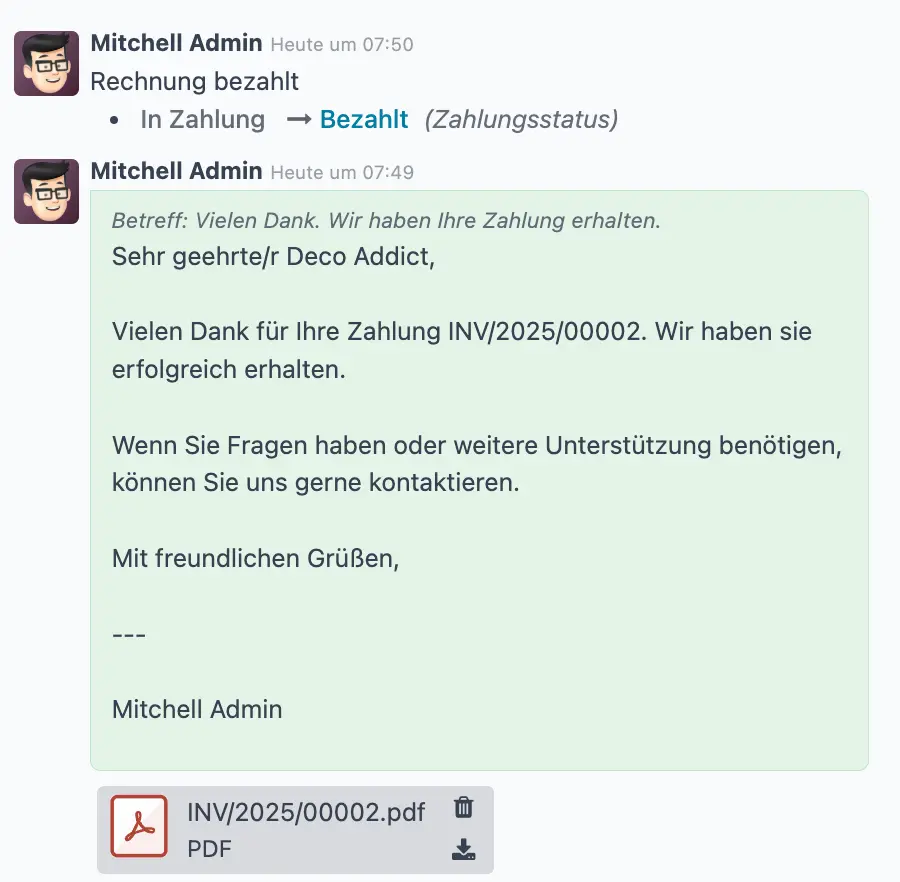
Now go back to your invoice. You will see that it’s now marked as Paid. The automation rule is triggered and the customer has received the Payment Notification email that we set up (see in the Chatter window - including all the filled-out dynamic placeholders)!

Looking for the right partner for your Odoo project?
Then much. Consulting is the perfect choice for you! As one of the largest Odoo Gold Partners in Germany, we support companies of all sizes and industries!