Sometimes, employees may cover expenses out of pocket when working on client projects – like transport or accommodation. These expenses need to be reinvoiced to the client. Odoo 17 makes it easy to re-invoice such expenses directly to the customer. Discover how to efficiently manage and re-invoice expenses using Odoo 17’s Accounting, Sales & Expenses modules with our step-by-step guide!
Re-invoicing is required for different use cases in various industries
Re-invoicing in Odoo 17 is an integrated process that involves the Accounting, Sales, and Expenses modules. It ensures that all project-related expenses are accurately tracked and billed to the client. Here’s how different businesses can benefit from this process:
- Consulting Firms: Consulting firms can record travel and accommodation expenses in the Expenses module and include them in client invoices, ensuring accurate billing
- Construction Companies: Construction companies can record and approve Project expenses and bill clients, ensuring all project costs are recovered
- Service Providers: Service providers can log purchases for client projects as expenses and ensure they are reimbursed for all costs incurred
- Freelancers and Small Businesses: Freelancers and small businesses can log expenses for travel, software, or equipment, get approval, link them to client invoices, and manage cash flow effectively
You need Accounting, Sales & Expenses apps to automate re-invoicing in Odoo 17
Re-invoicing in Odoo 17 is not just about managing expenses. It’s an integrated process that is based on the Sales and Accounting modules for accurate client billing. This is how the integration works:
- Expenses Module: Records costs incurred by employees
- Sales Module: Links expenses to sales orders, making sure they are billed to the client
- Accounting Module: Handles the approval and financial recording of these expenses
How to re-invoice customer expenses in Odoo 17: 5-step guide
FYI: Before you start, ensure you have the Sales and Accounting modules installed along with the Expenses app.
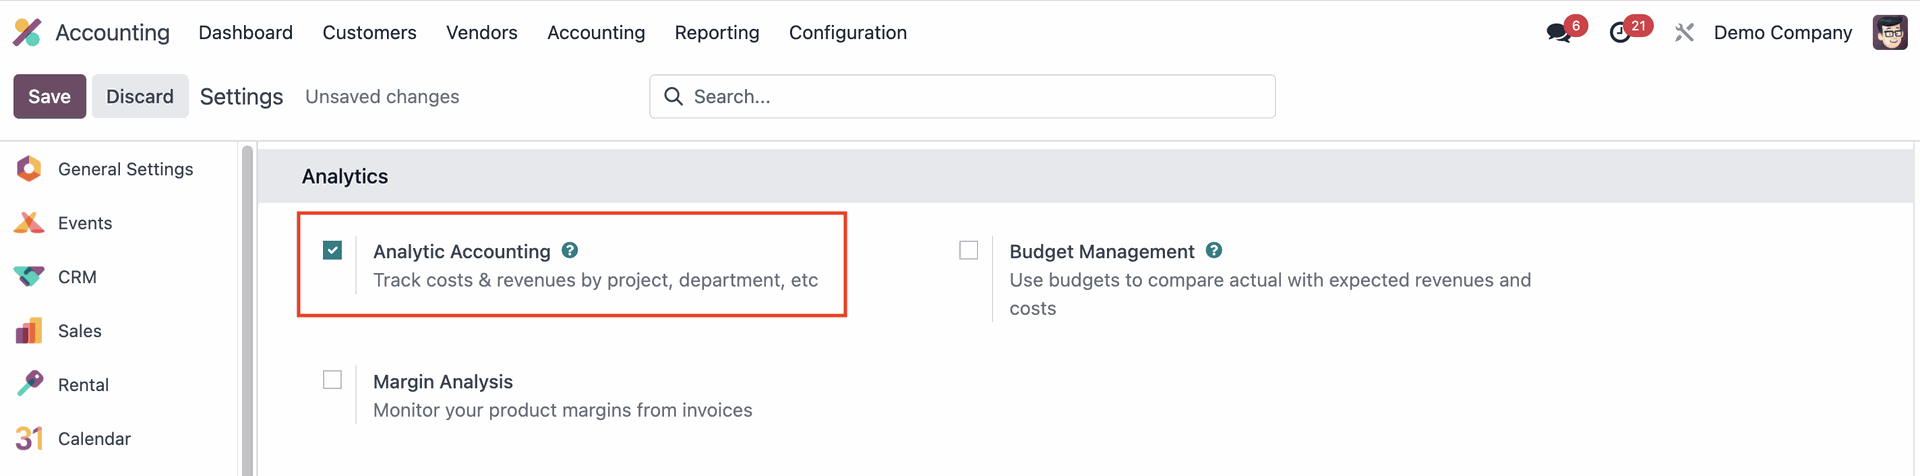
Step 1: Activate Accounting configurations
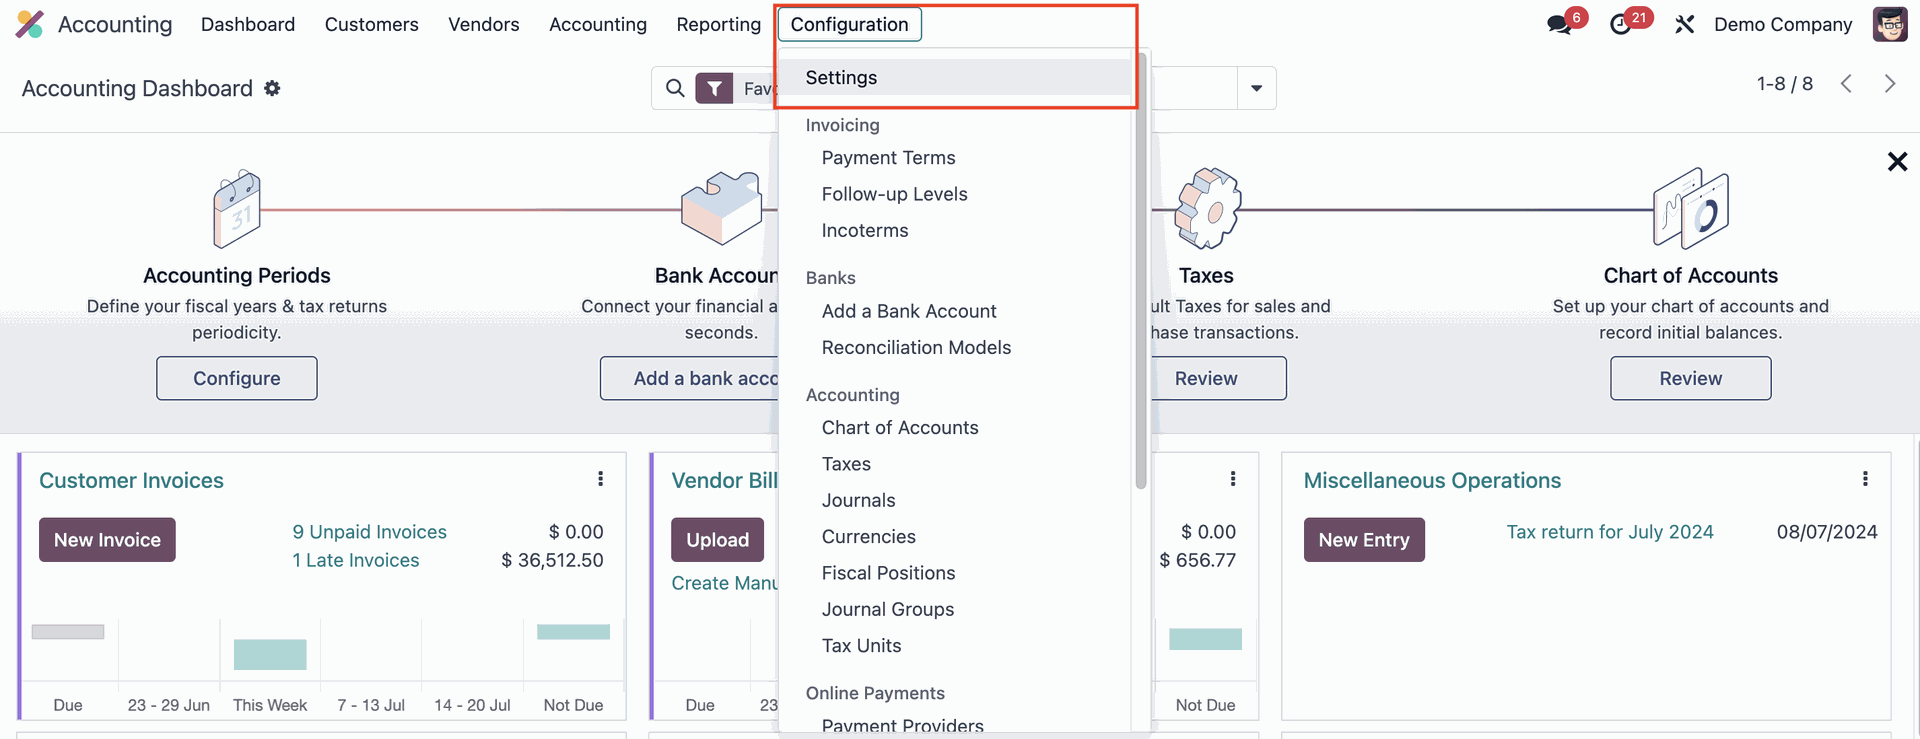
Go to the Accounting module, then head to Configuration > Settings
Activate Analytic Accounting and click Save to apply these changes
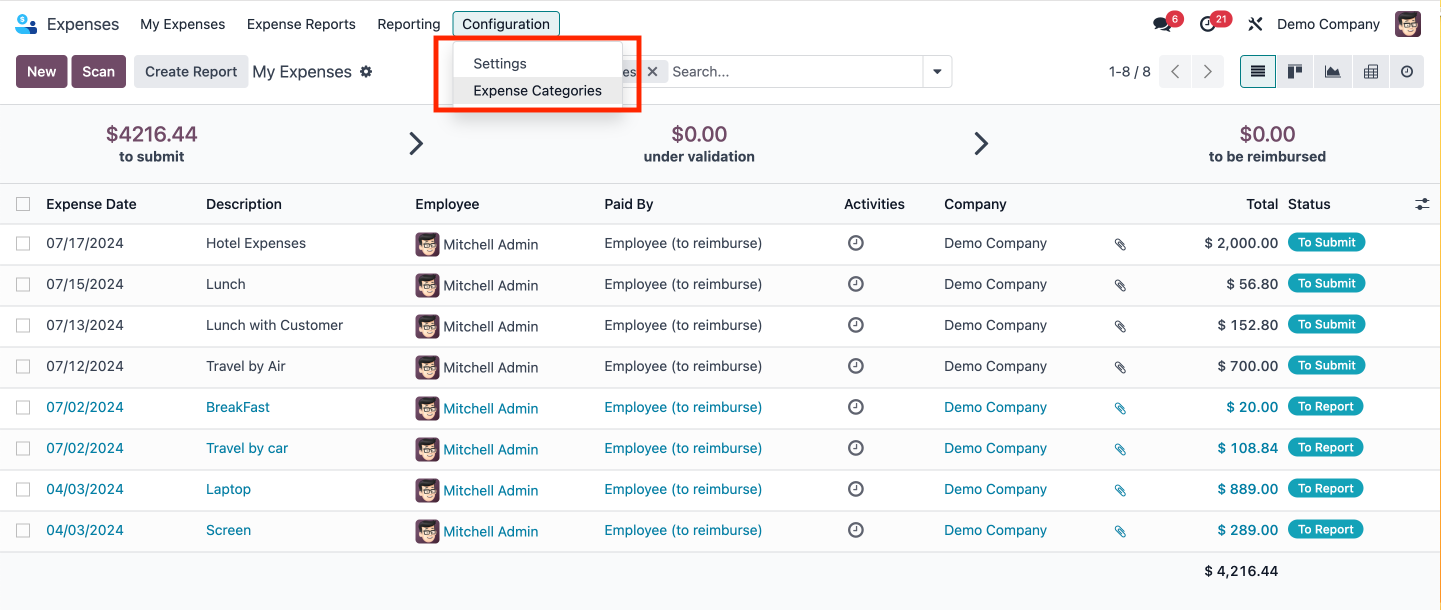
Step 2: Set up the Expenses app & products
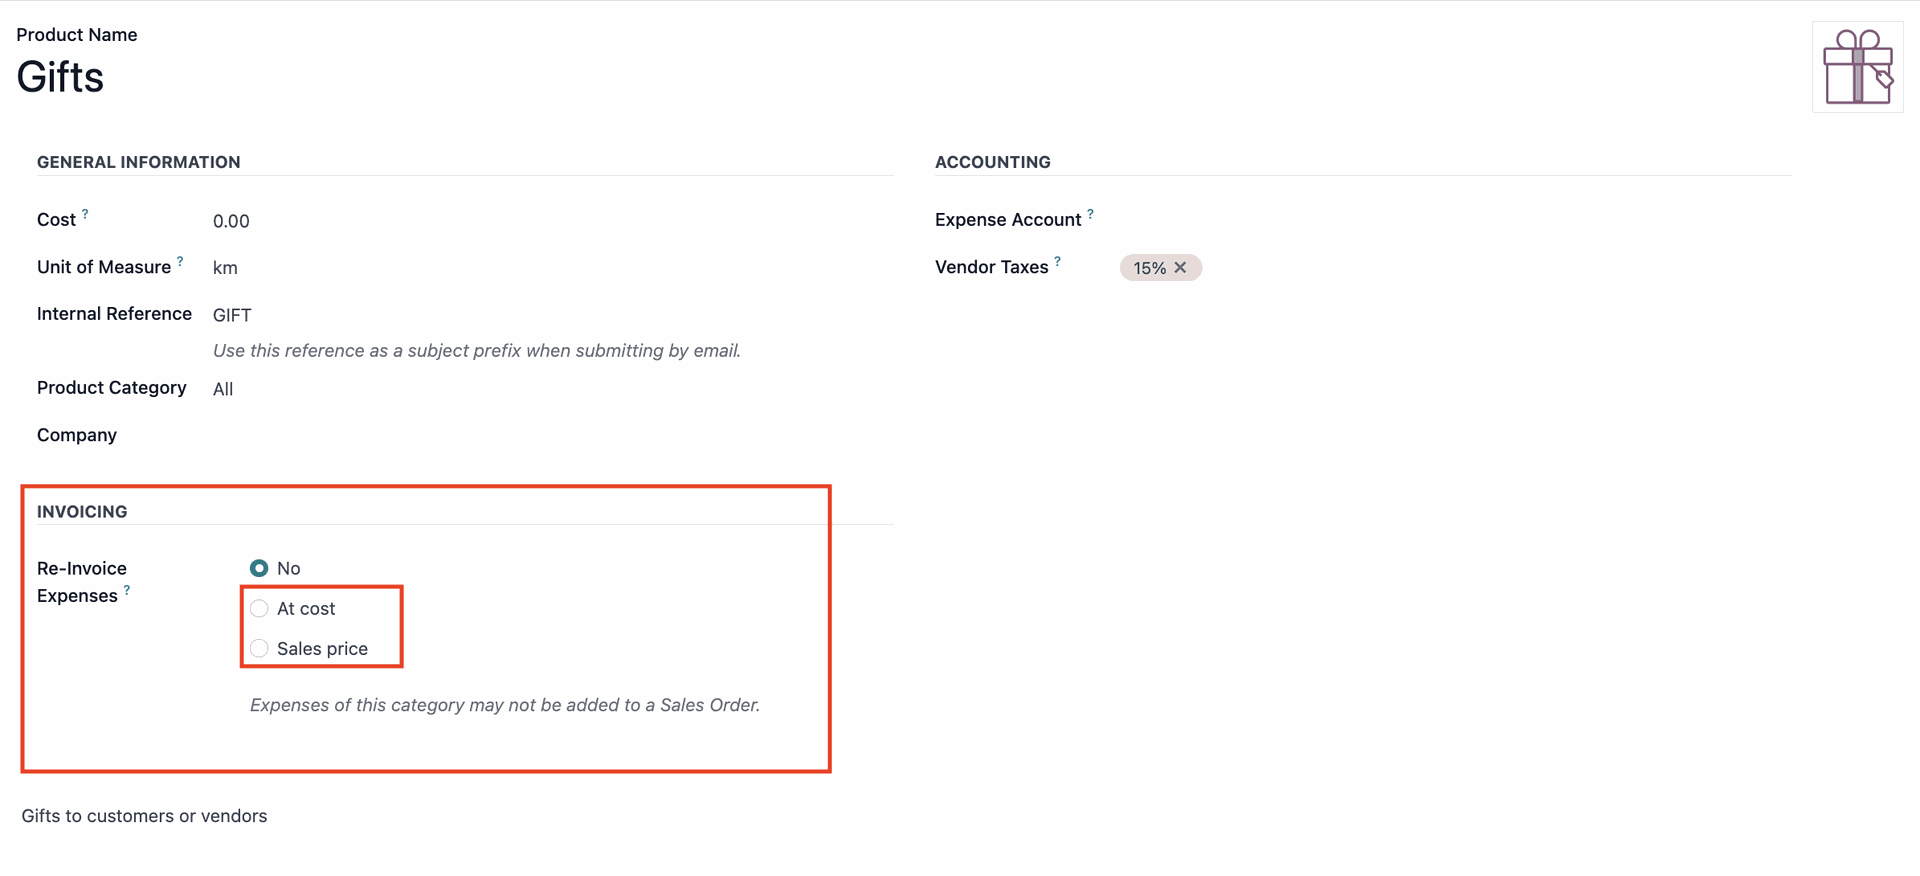
By default, the “Customer to Re-invoice” option is enabled for certain expense categories like Travel & Accommodation, Communication, Meals, and Mileage. However, not all default categories have this option activated. To enable it:
Navigate to the Expenses app in Odoo
Go to Configuration > Expense Categories to see all categories
Check the Re-Invoice Expenses column to see current settings and click a row to open
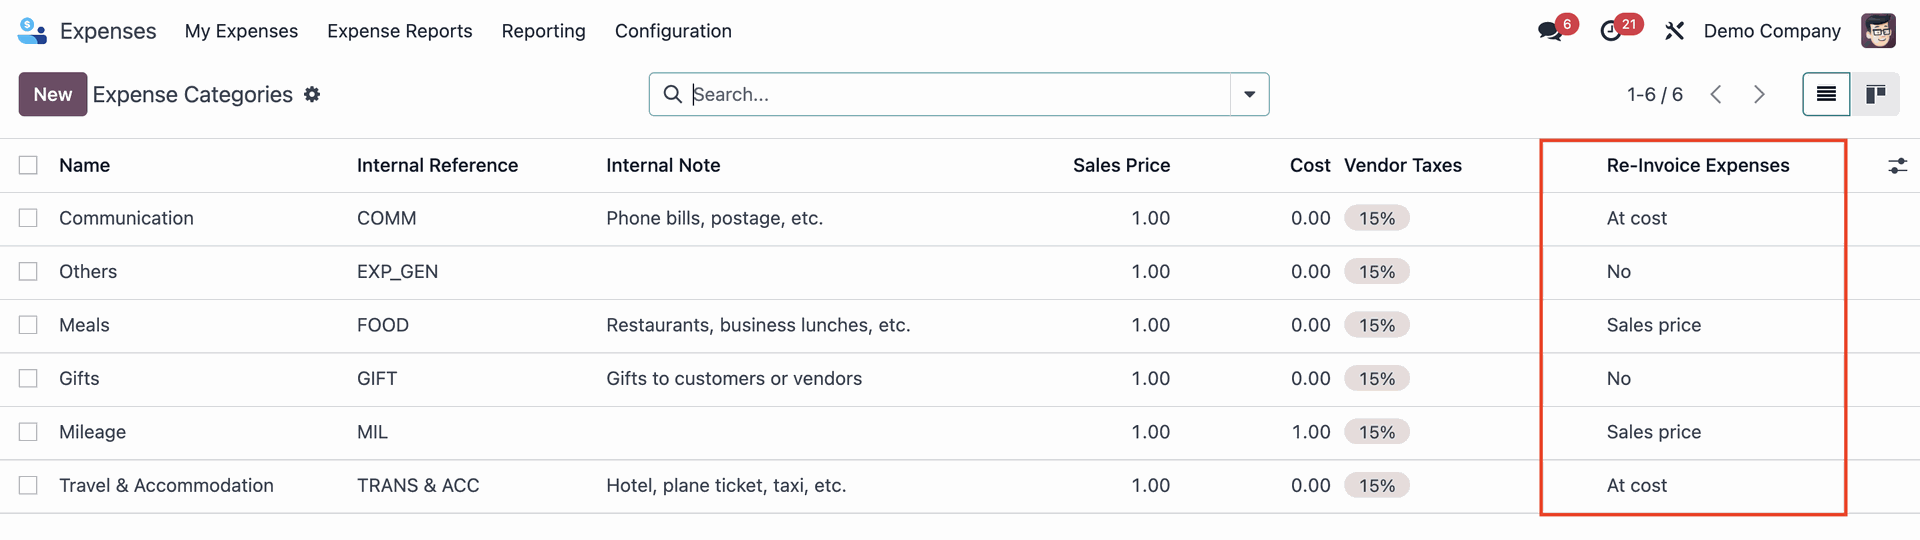
In the Invoice section, select "At cost" or "Sales price" in the "Re-Invoice Expenses" field
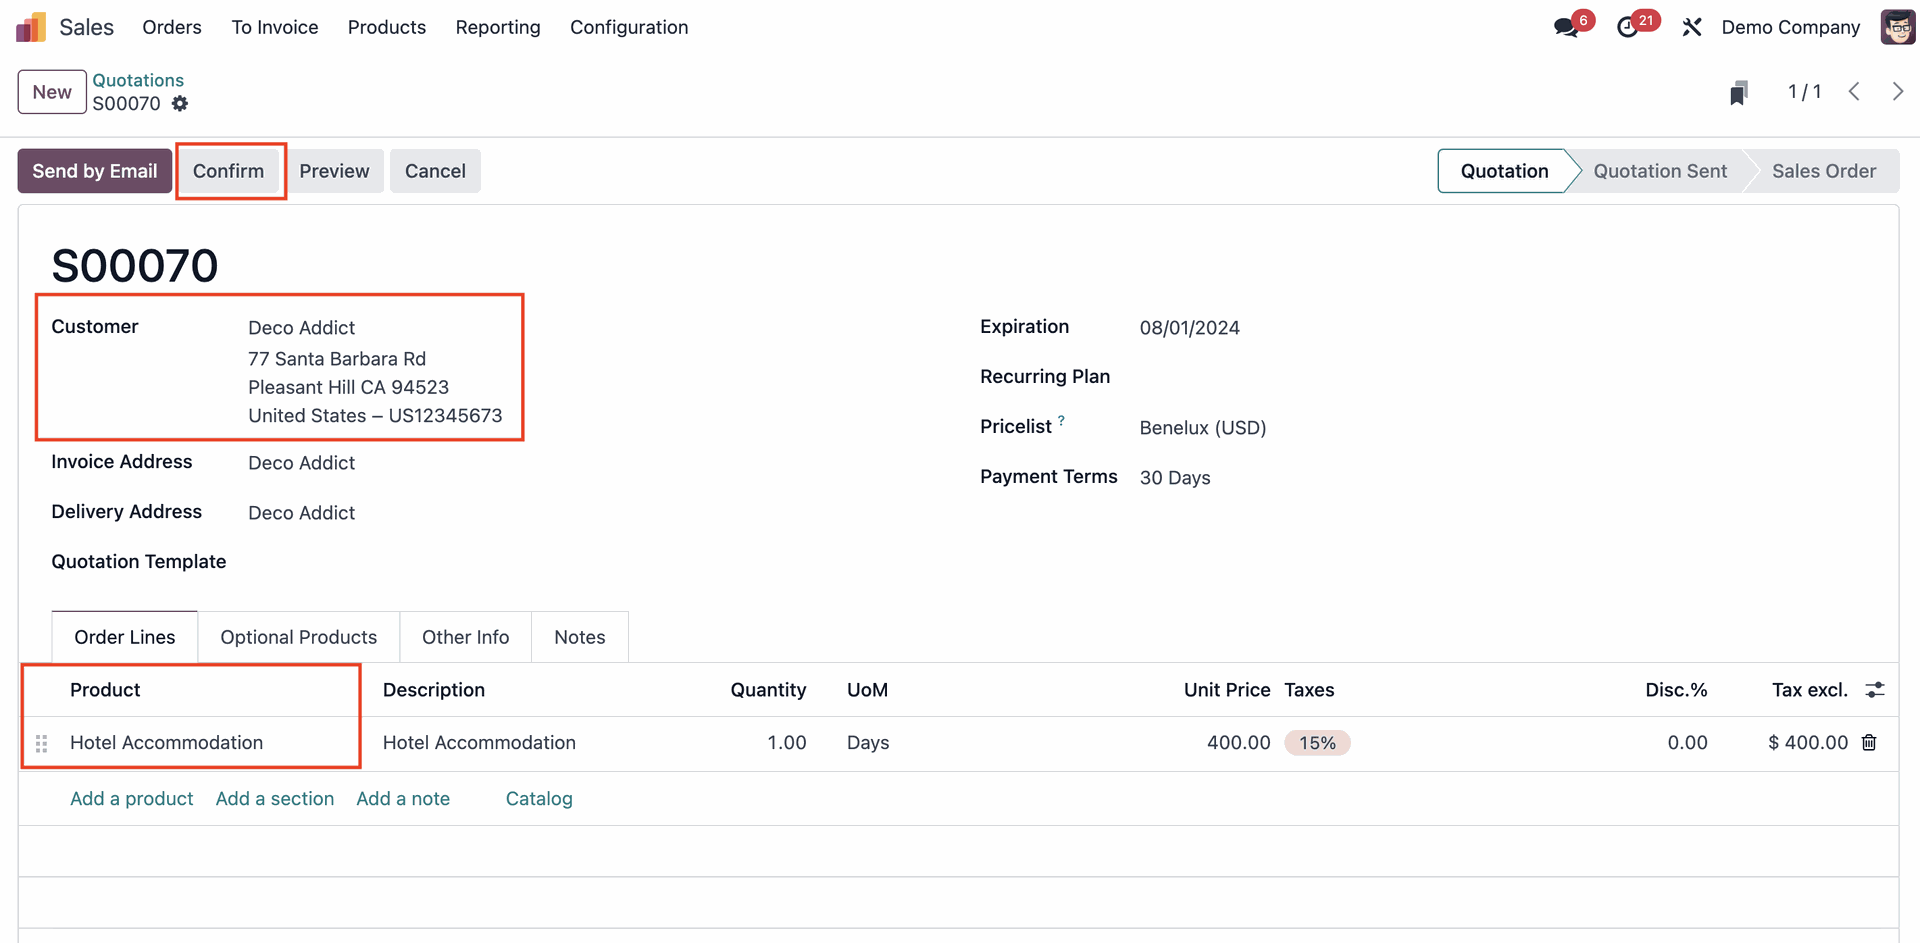
Step 3: Add expenses to Sales Order
Create a Sales Order, add a Customer and Product. Confirm the Sales Order
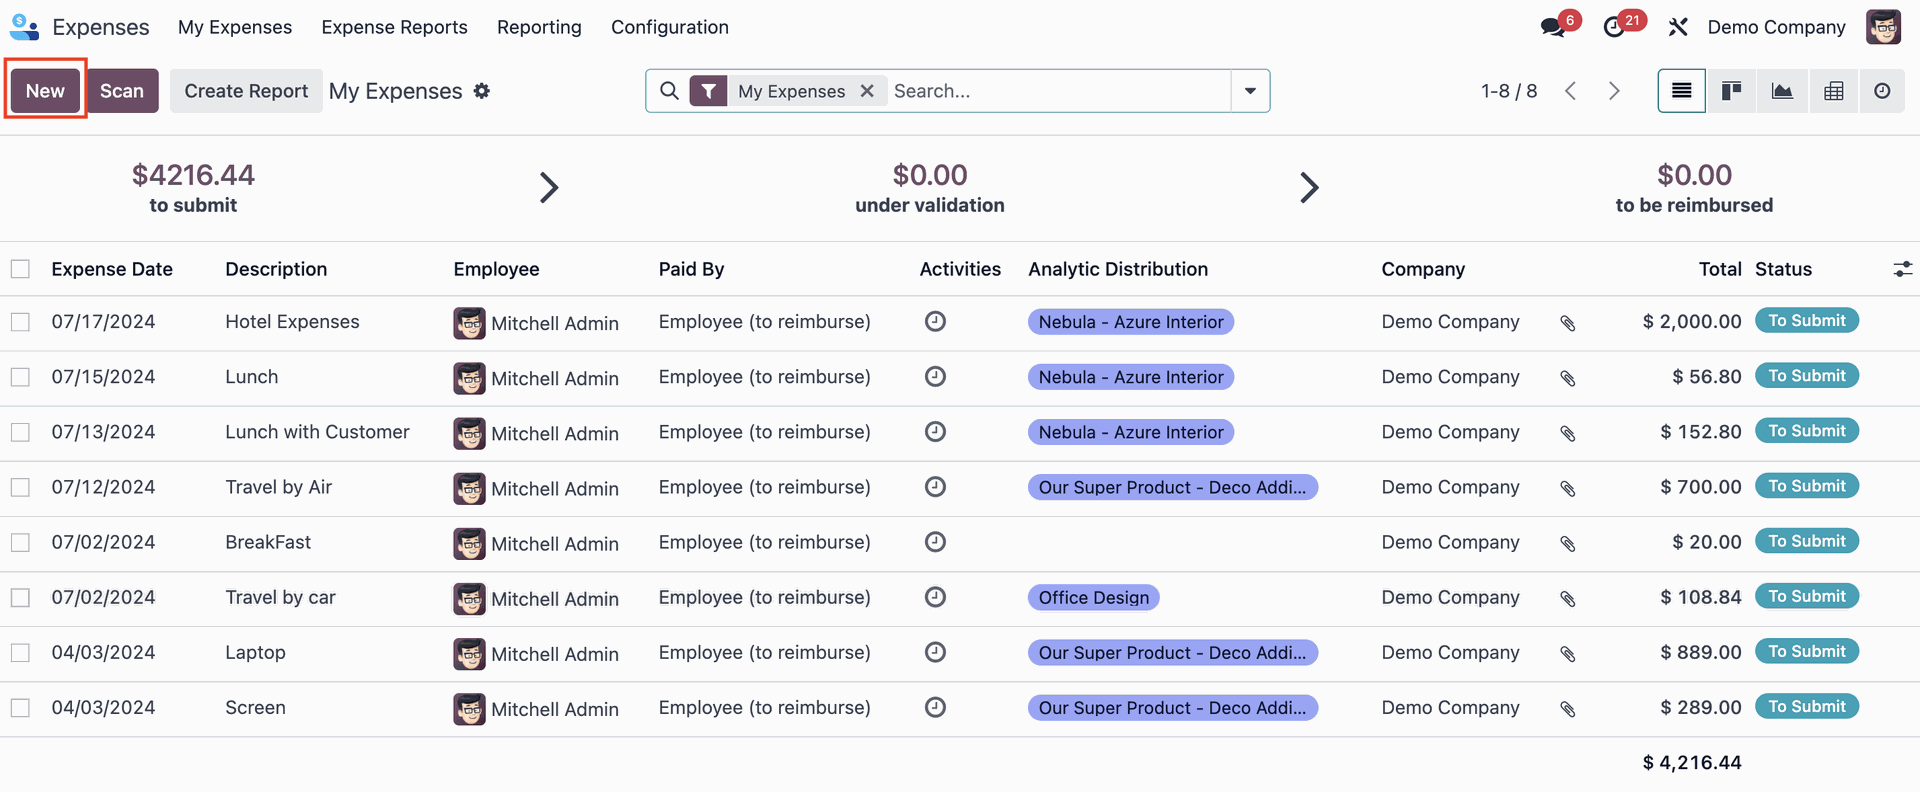
Go to the Expenses app dashboard and click on "New"
Add a description to your Expense form and choose one of the following categories. As we are creating an expense for Hotel Accommodation, we will choose the last option.
- Communication: any form of communication related to a project/order
- Others: expenses that don’t fit into any other categories
- Meals: any form of meal costs related to a project/order
- Gifts: any form of gift costs related to a project/order
- Mileage: any form of mileage (gas) costs related to project/order
- Travel & Accommodation: any travel or accommodation costs related to a project/order
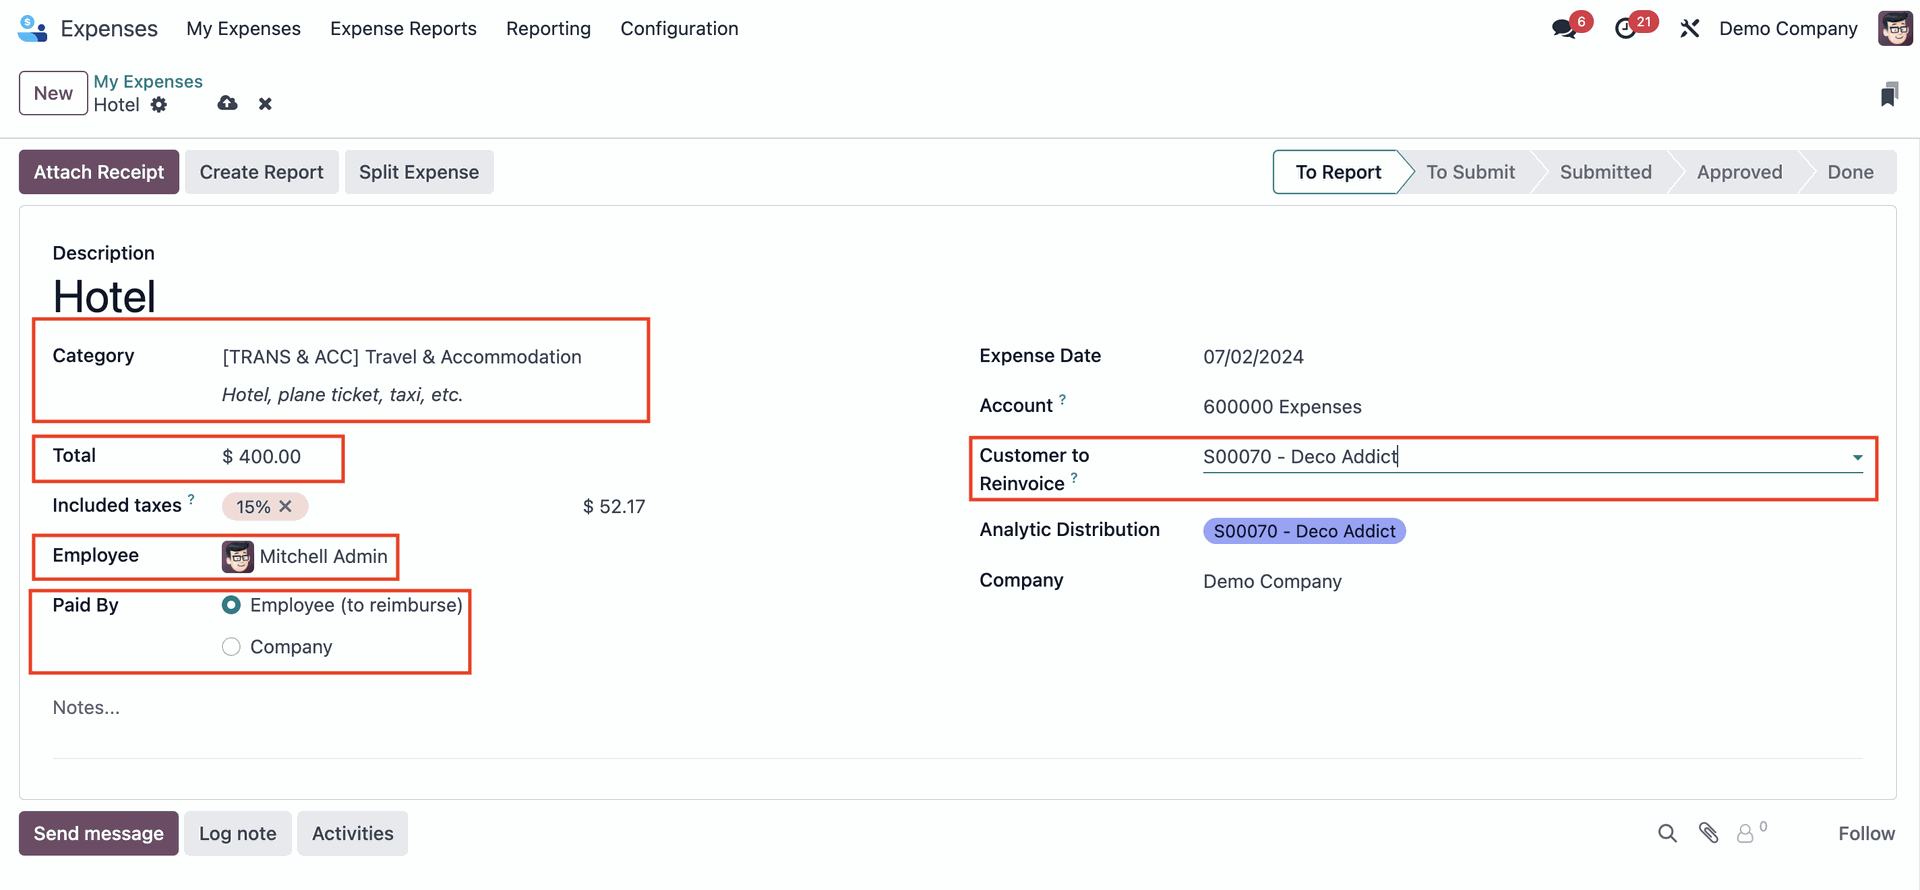
Enter the total amount to be expensed (same as the product in the Sales Order). Fields like Included taxes, Expense Date, and Account will auto-populate but you can alter them if needed
Choose which employee was responsible for the expense. In this example, the employee paid out of pocket – so we will choose the Employee (to reimburse) option
In the Customer to Re-invoice section, select the Sales Order to which this expense should be attached. You also have the option to attach receipts and split expenses if needed.
Step 4: Record & post the expense
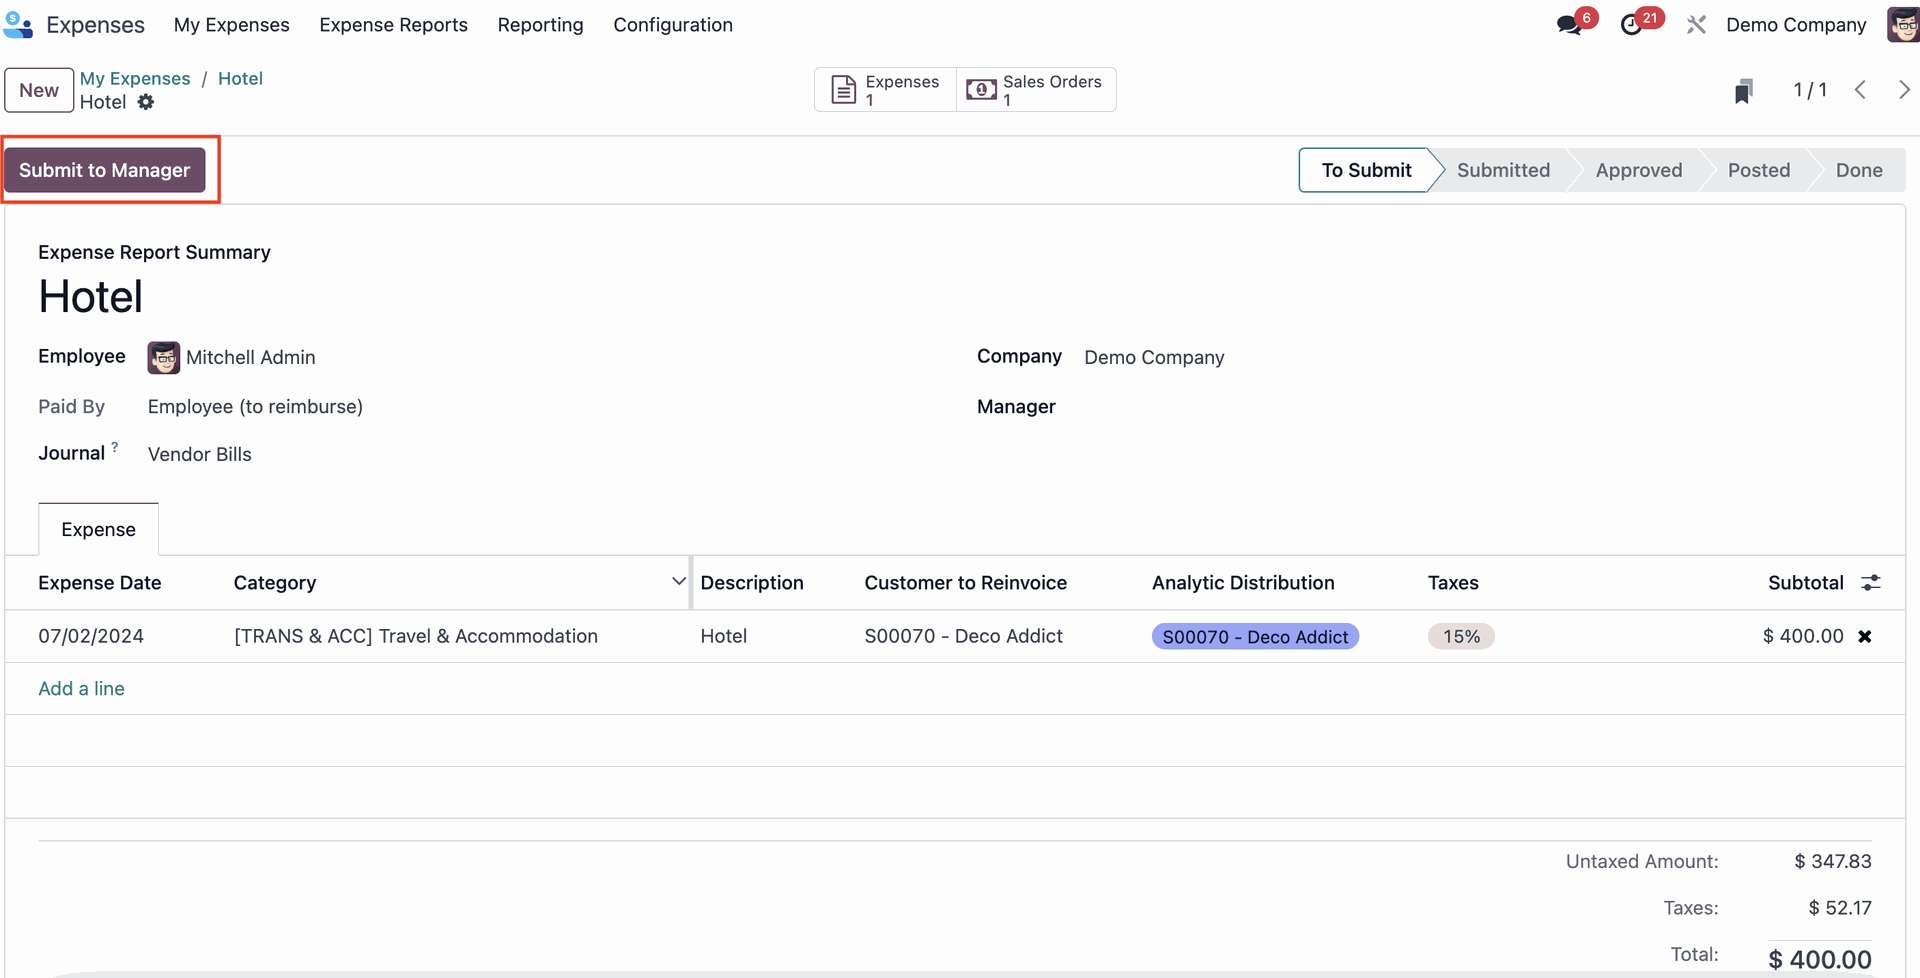
Once the expense has been filled out, click on "Create Report"
Once the report is created, click on "Submit to Manager" for approval
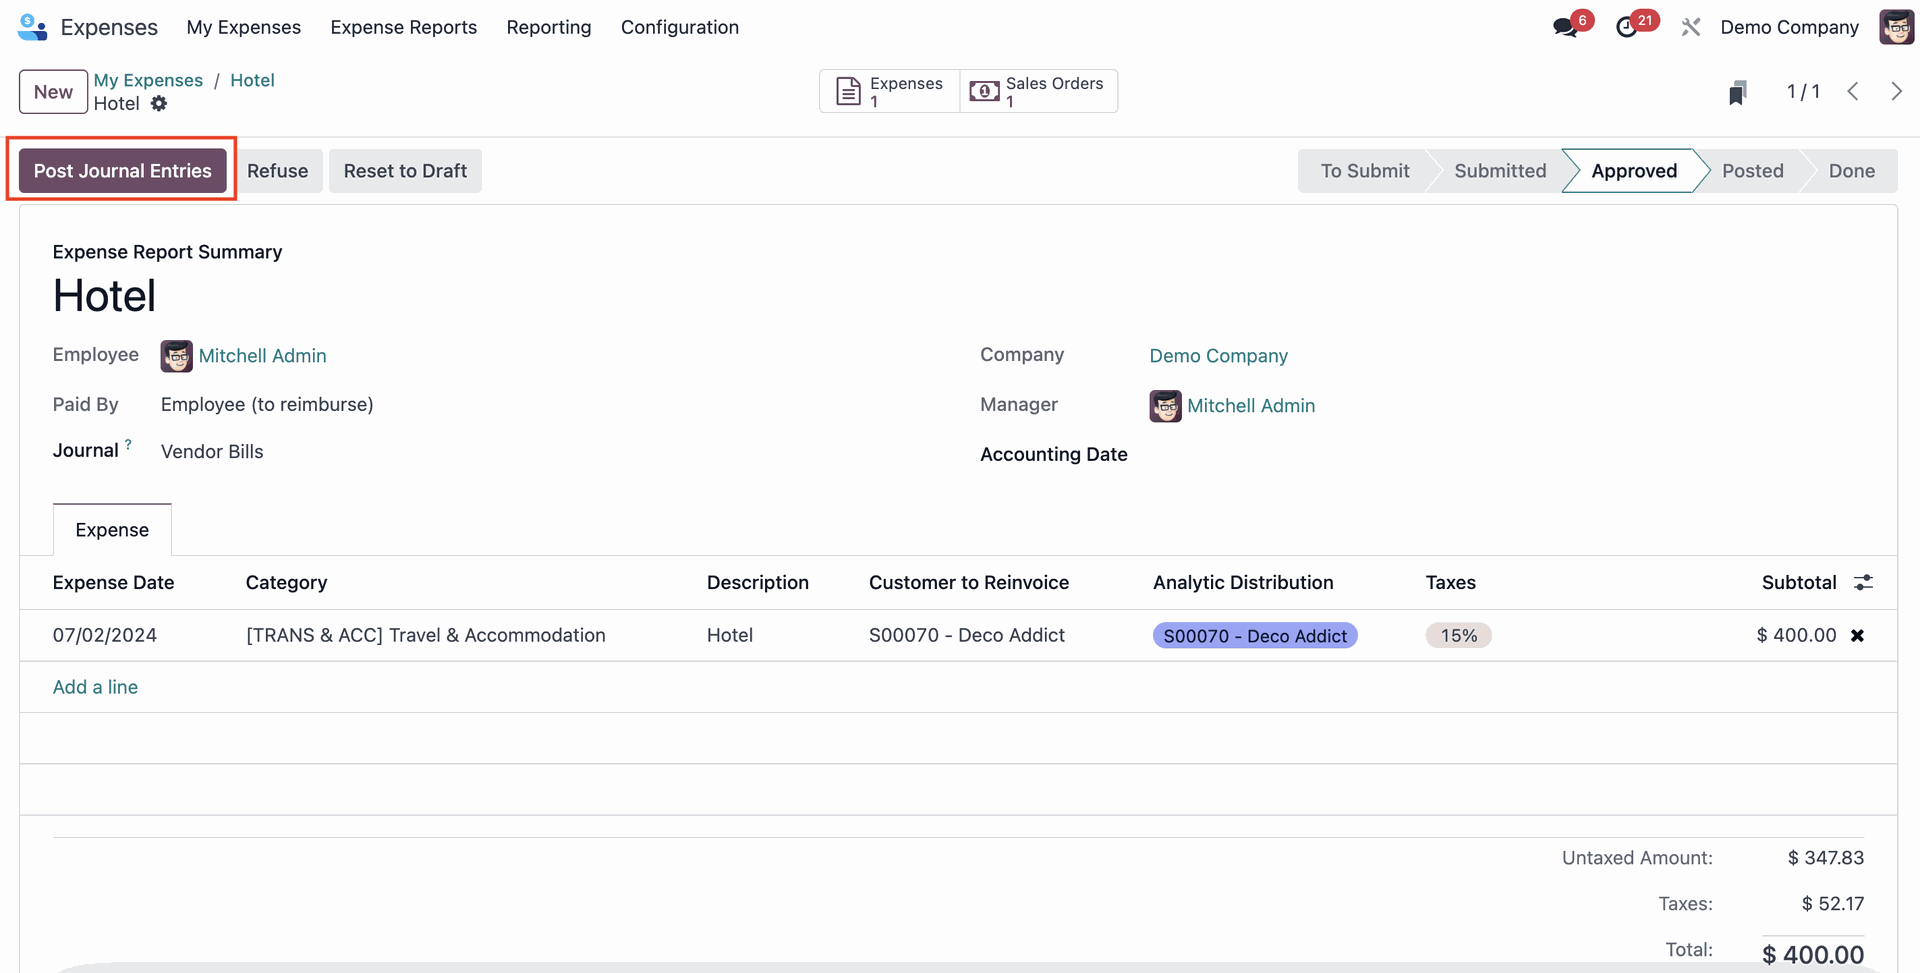
After the report is approved, the manager will click on "Post Journal Entries"
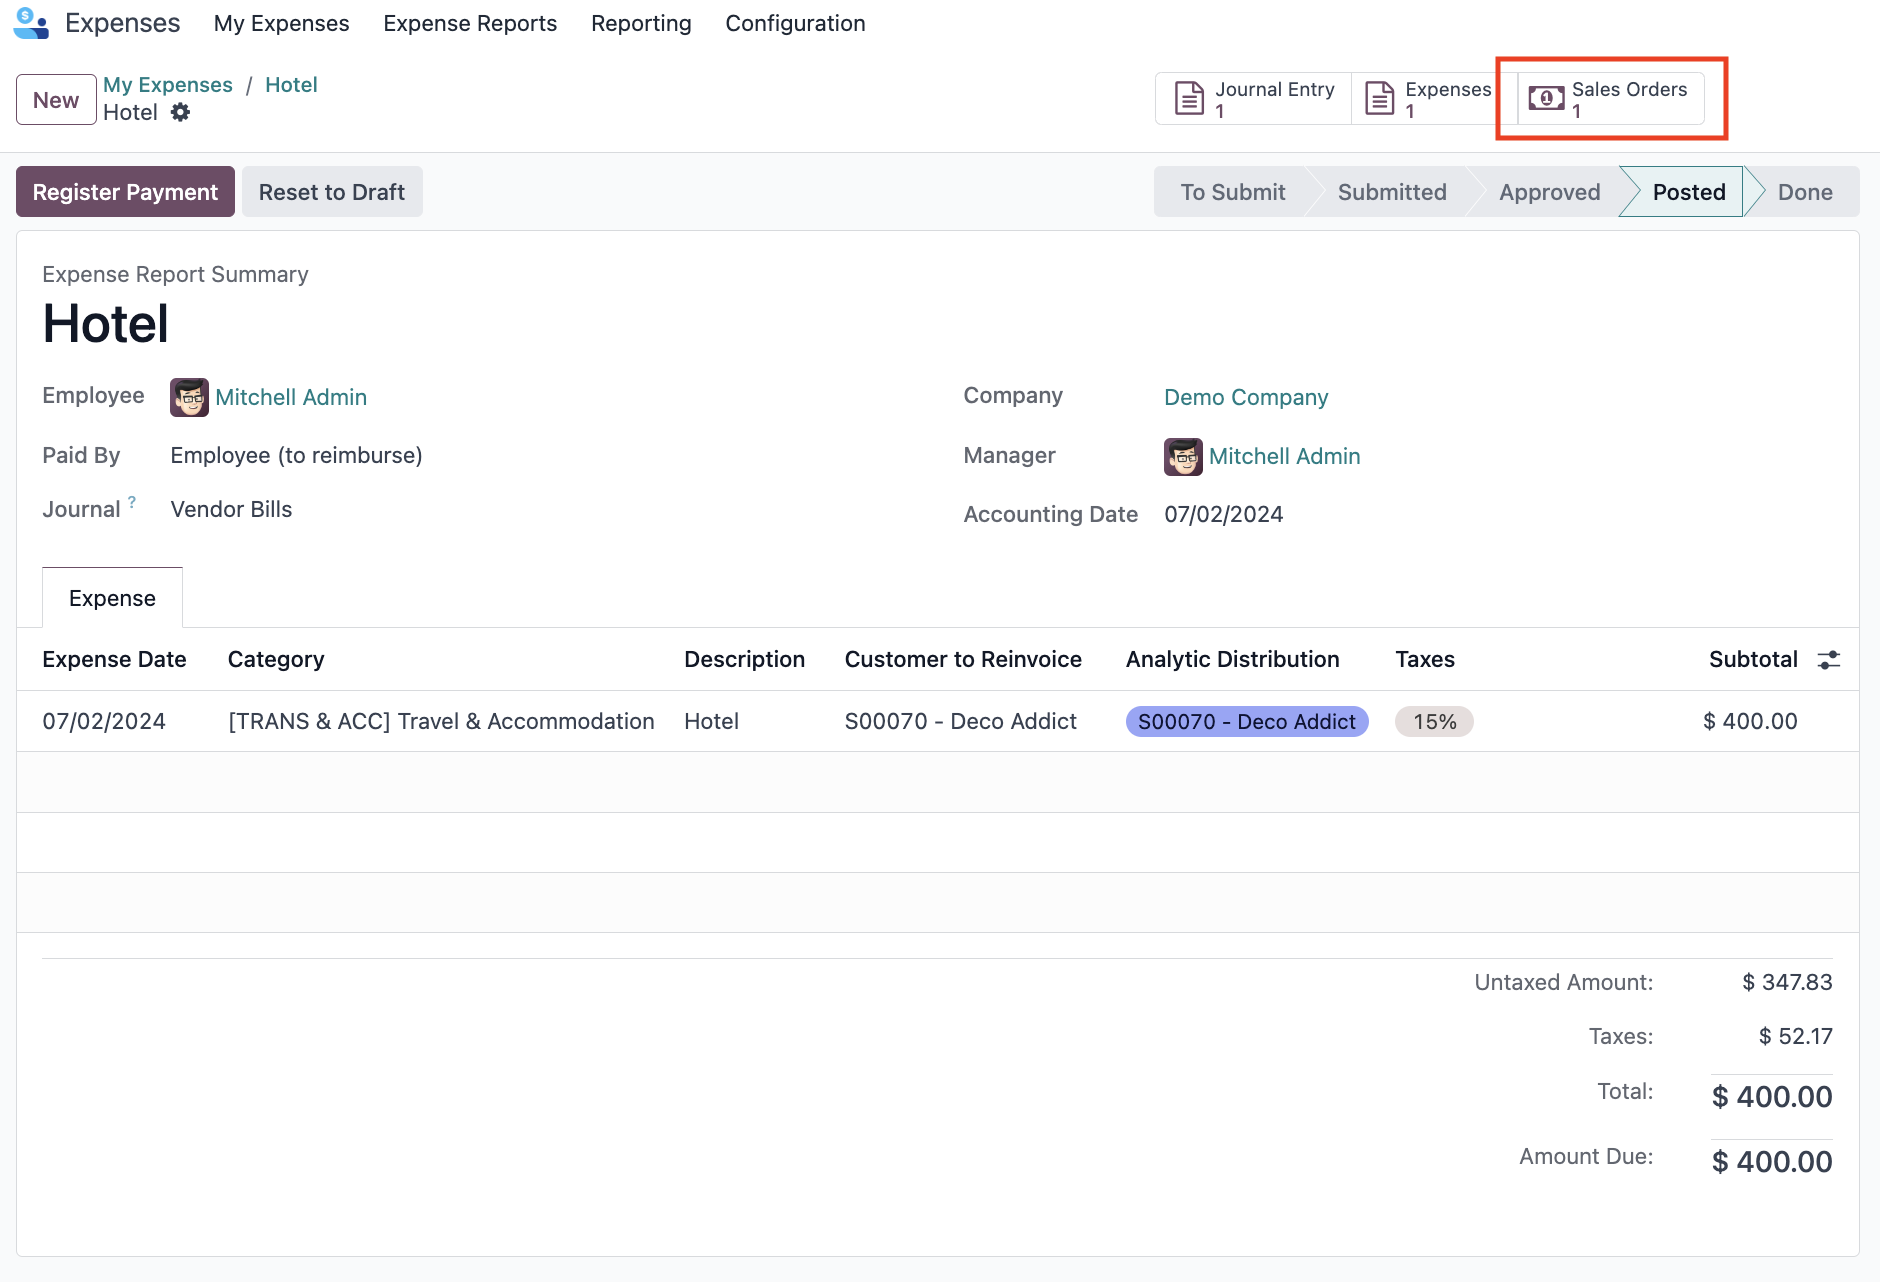
Step 5: Re-invoice the expense
Return to the Sales Order (you can click on the Smart Button on top of the Expense report)
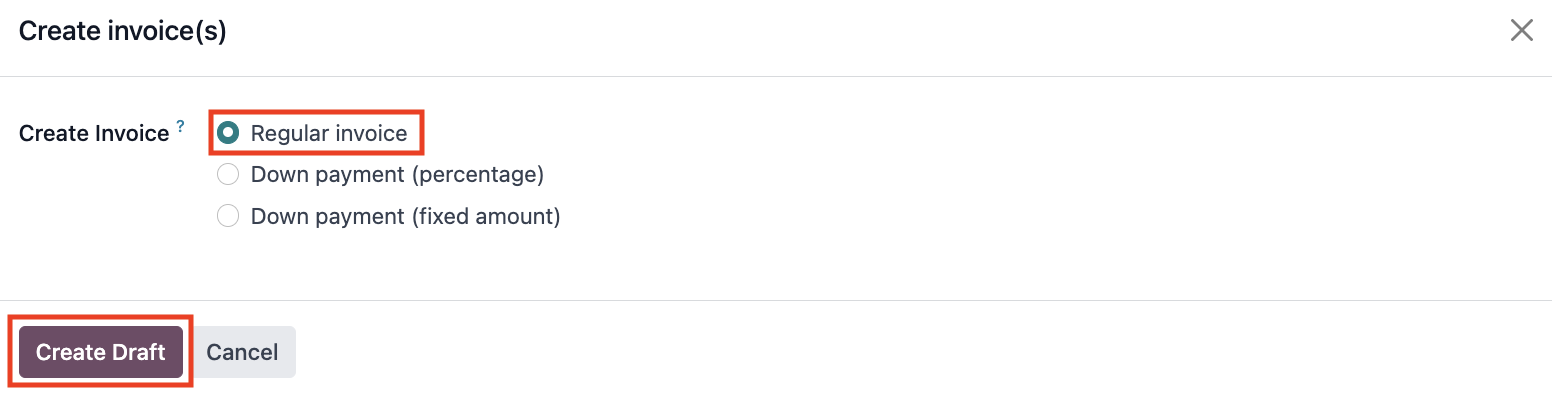
The new expense now shows up as an Order Line, the Delivered column is filled in, and you can now click on "Create Invoice".

When you click on "Create Invoice", a pop-up will appear. Keep it on the default "Regular Invoice" and click on "Create Draft".
This draft will only reveal the expense in the Order line. If everything is correct, click Confirm. This will change the invoice’s status to "Posted".
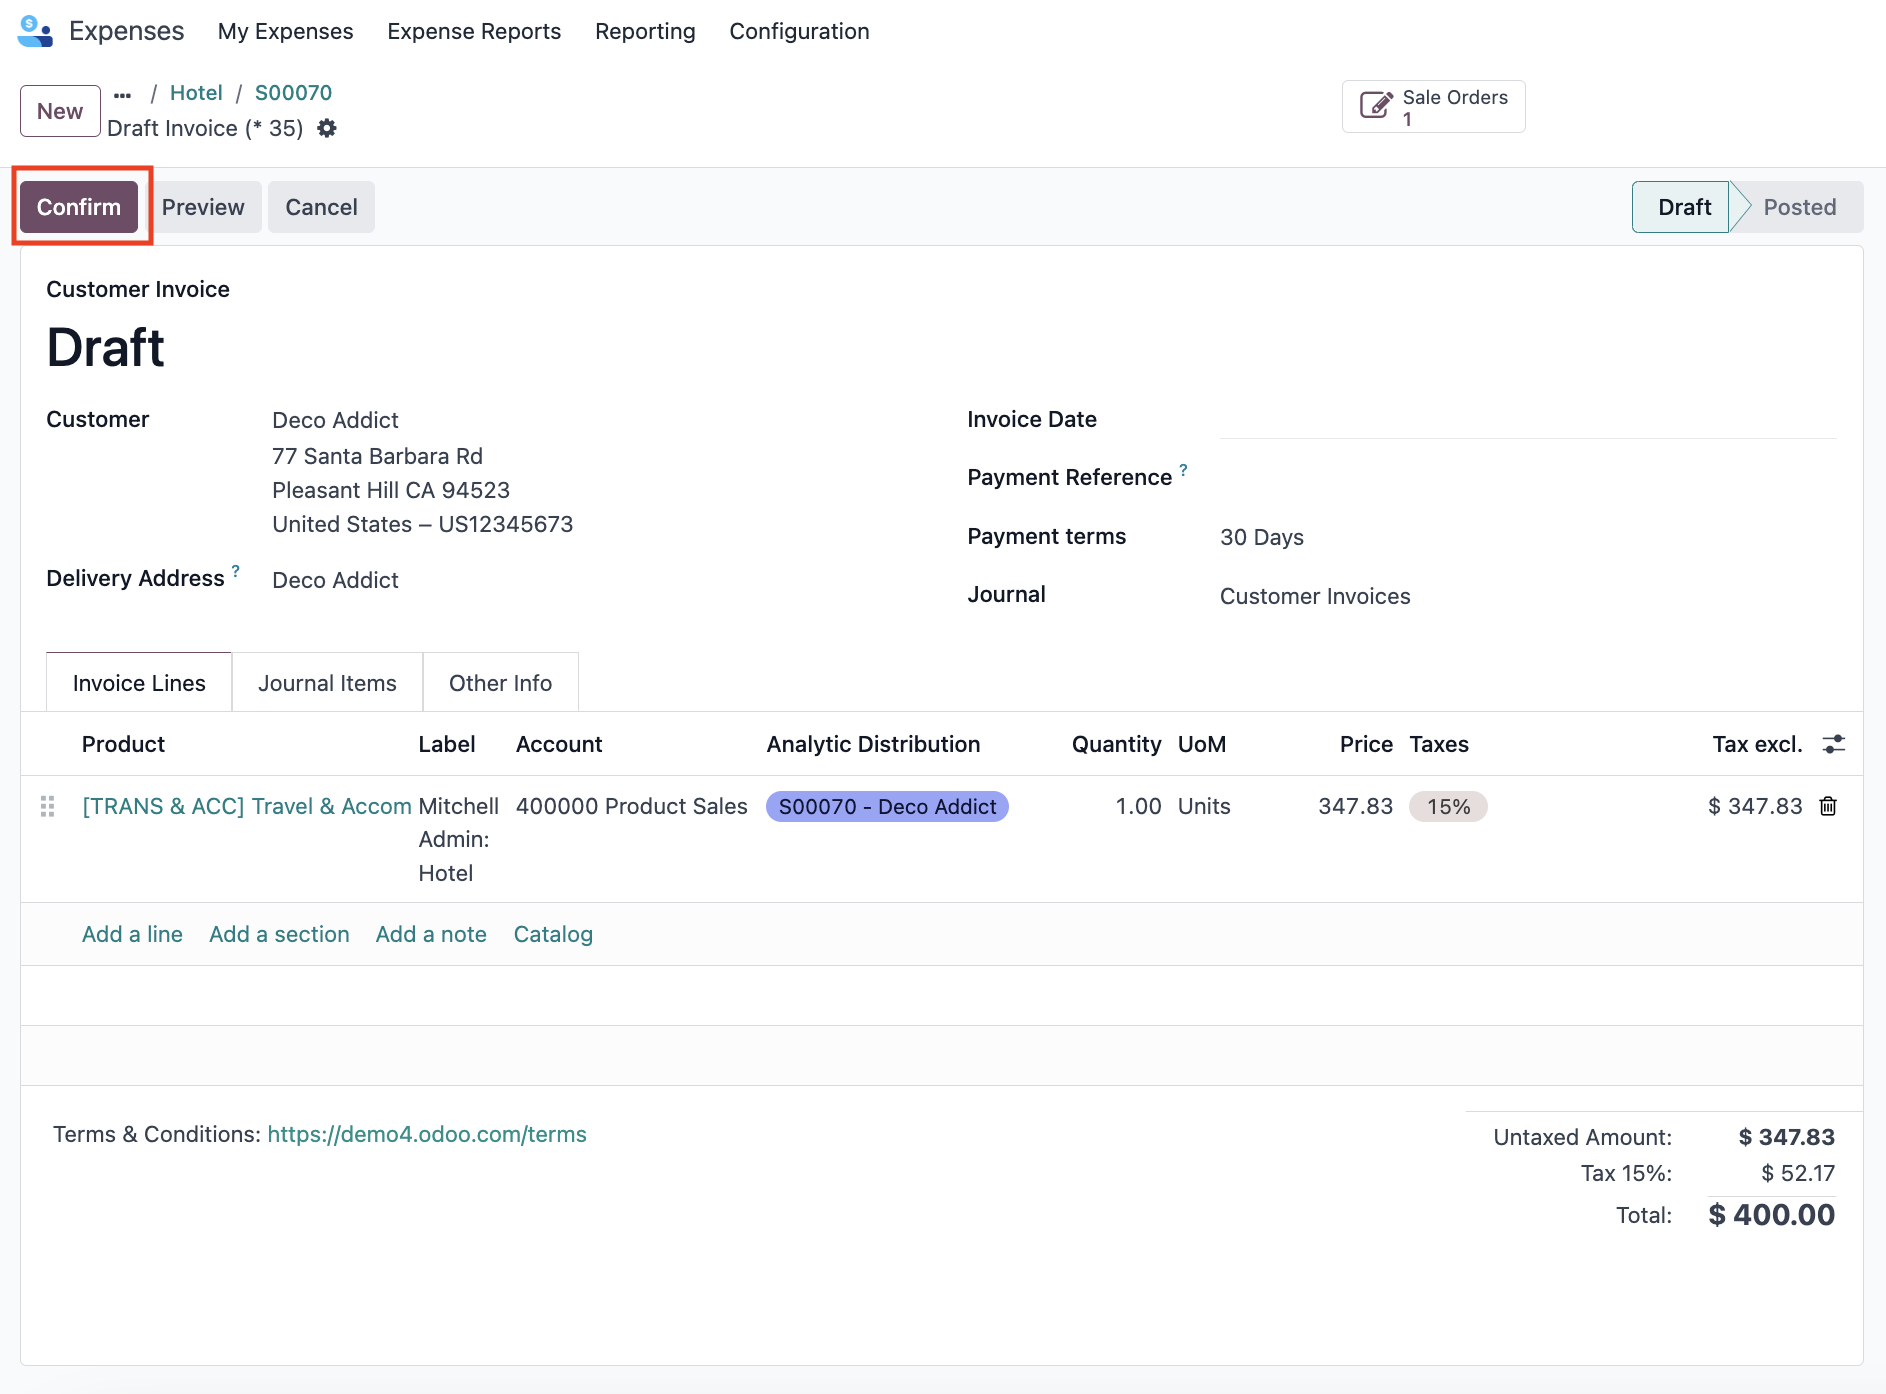
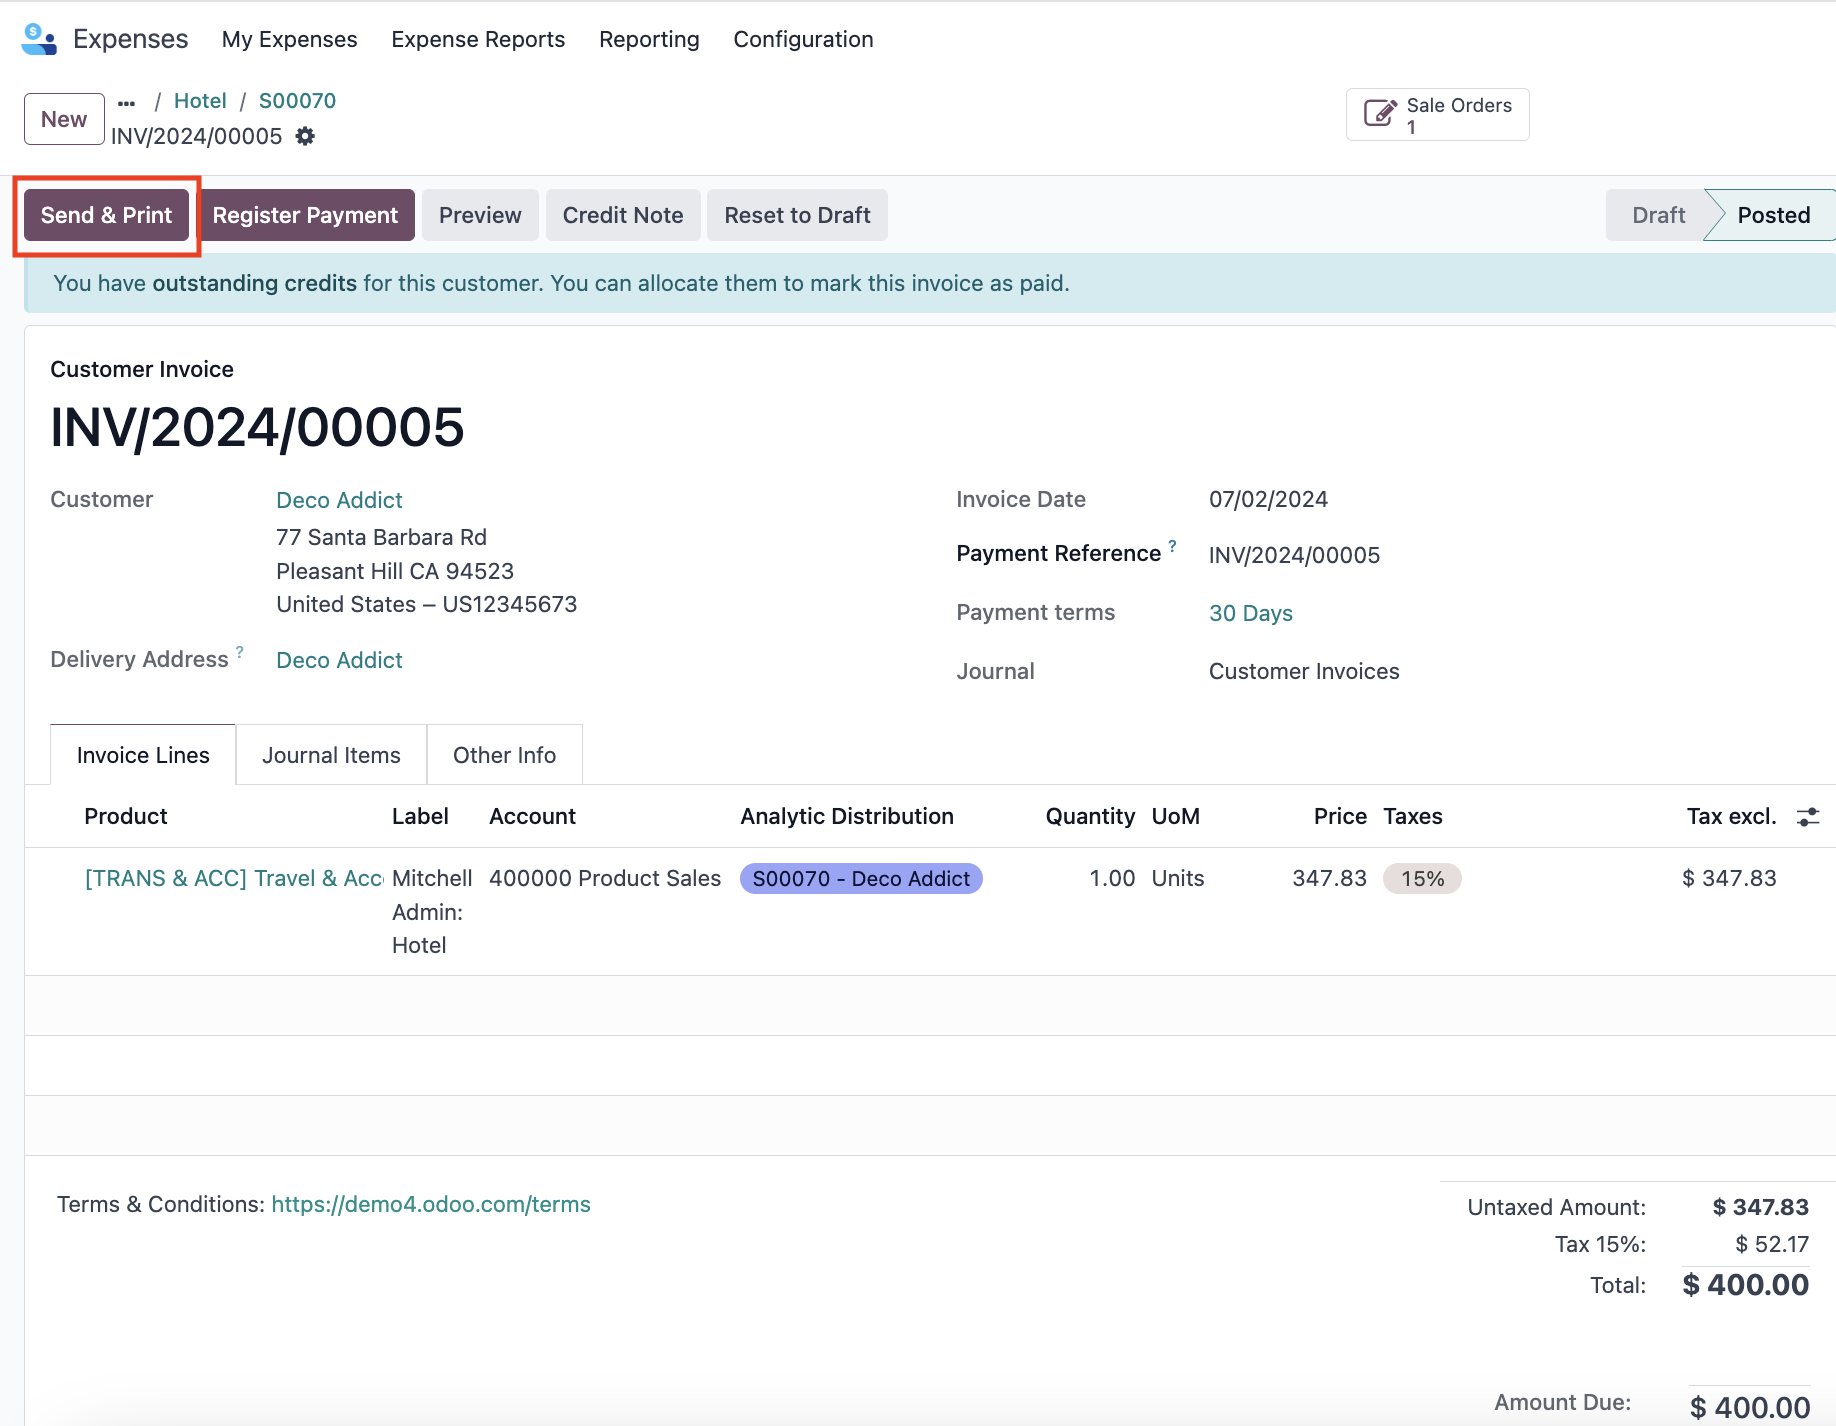
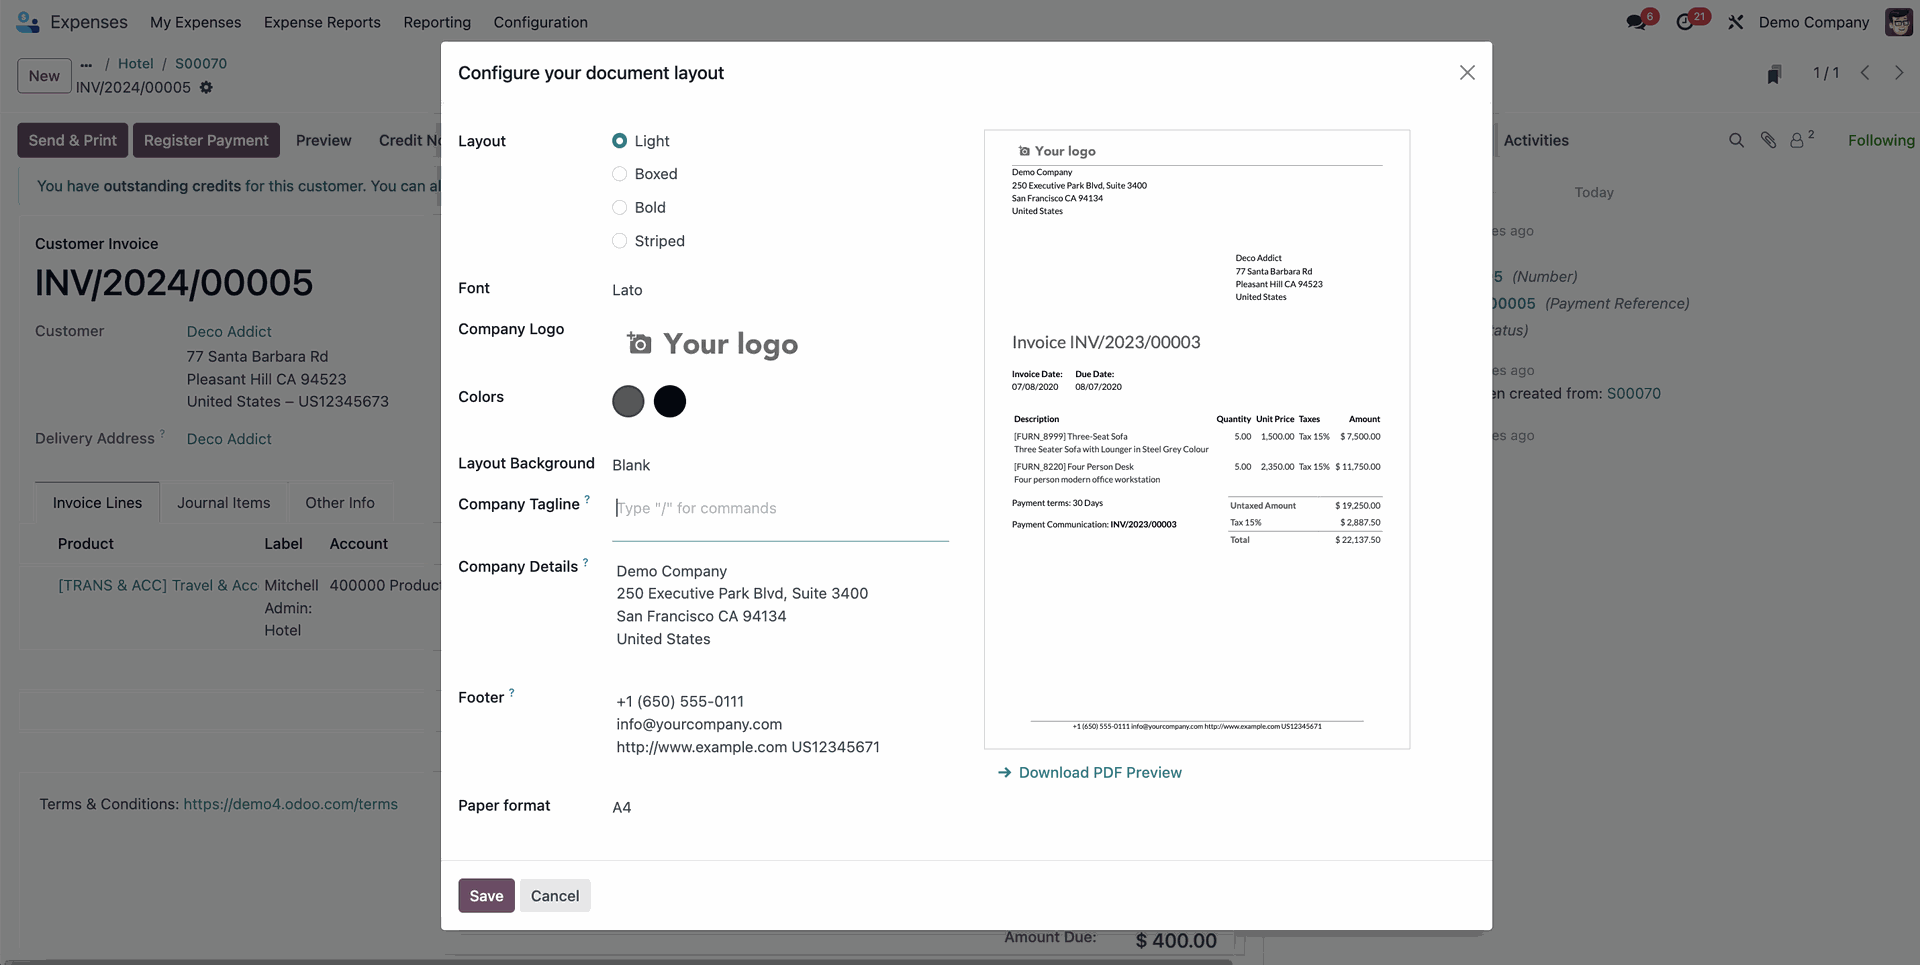
Once your invoice is posted, click on "Send & Print" to forward your invoice to the customer.
You will get a pop-up that allows you to review and modify the message and documents.
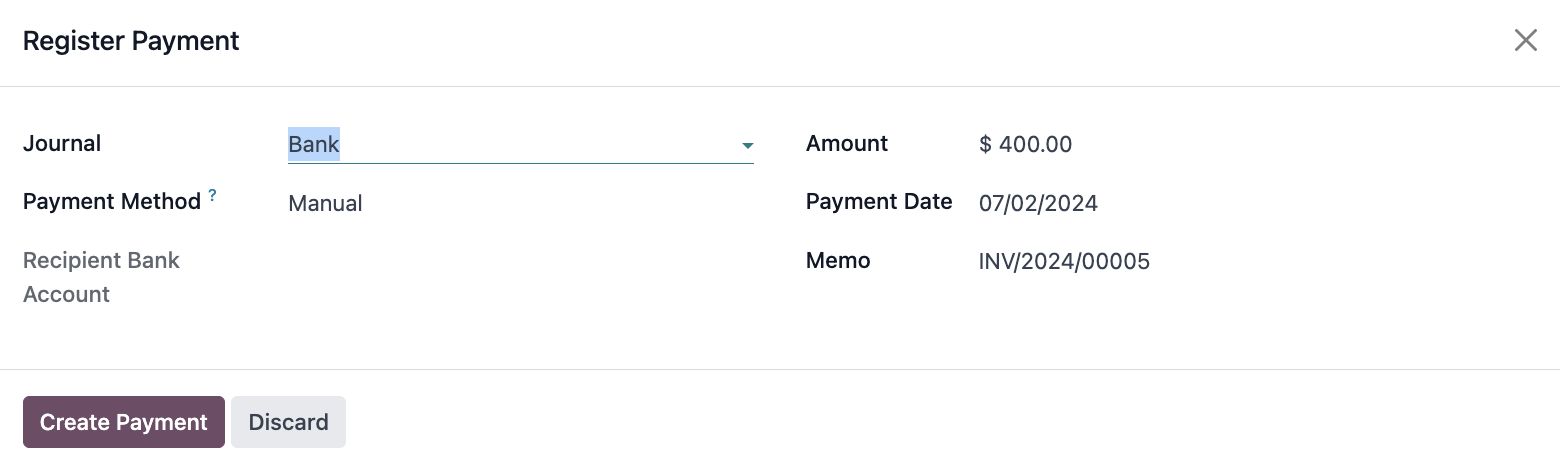
The invoice has been sent to the customer, you can now click on "Register Payment".
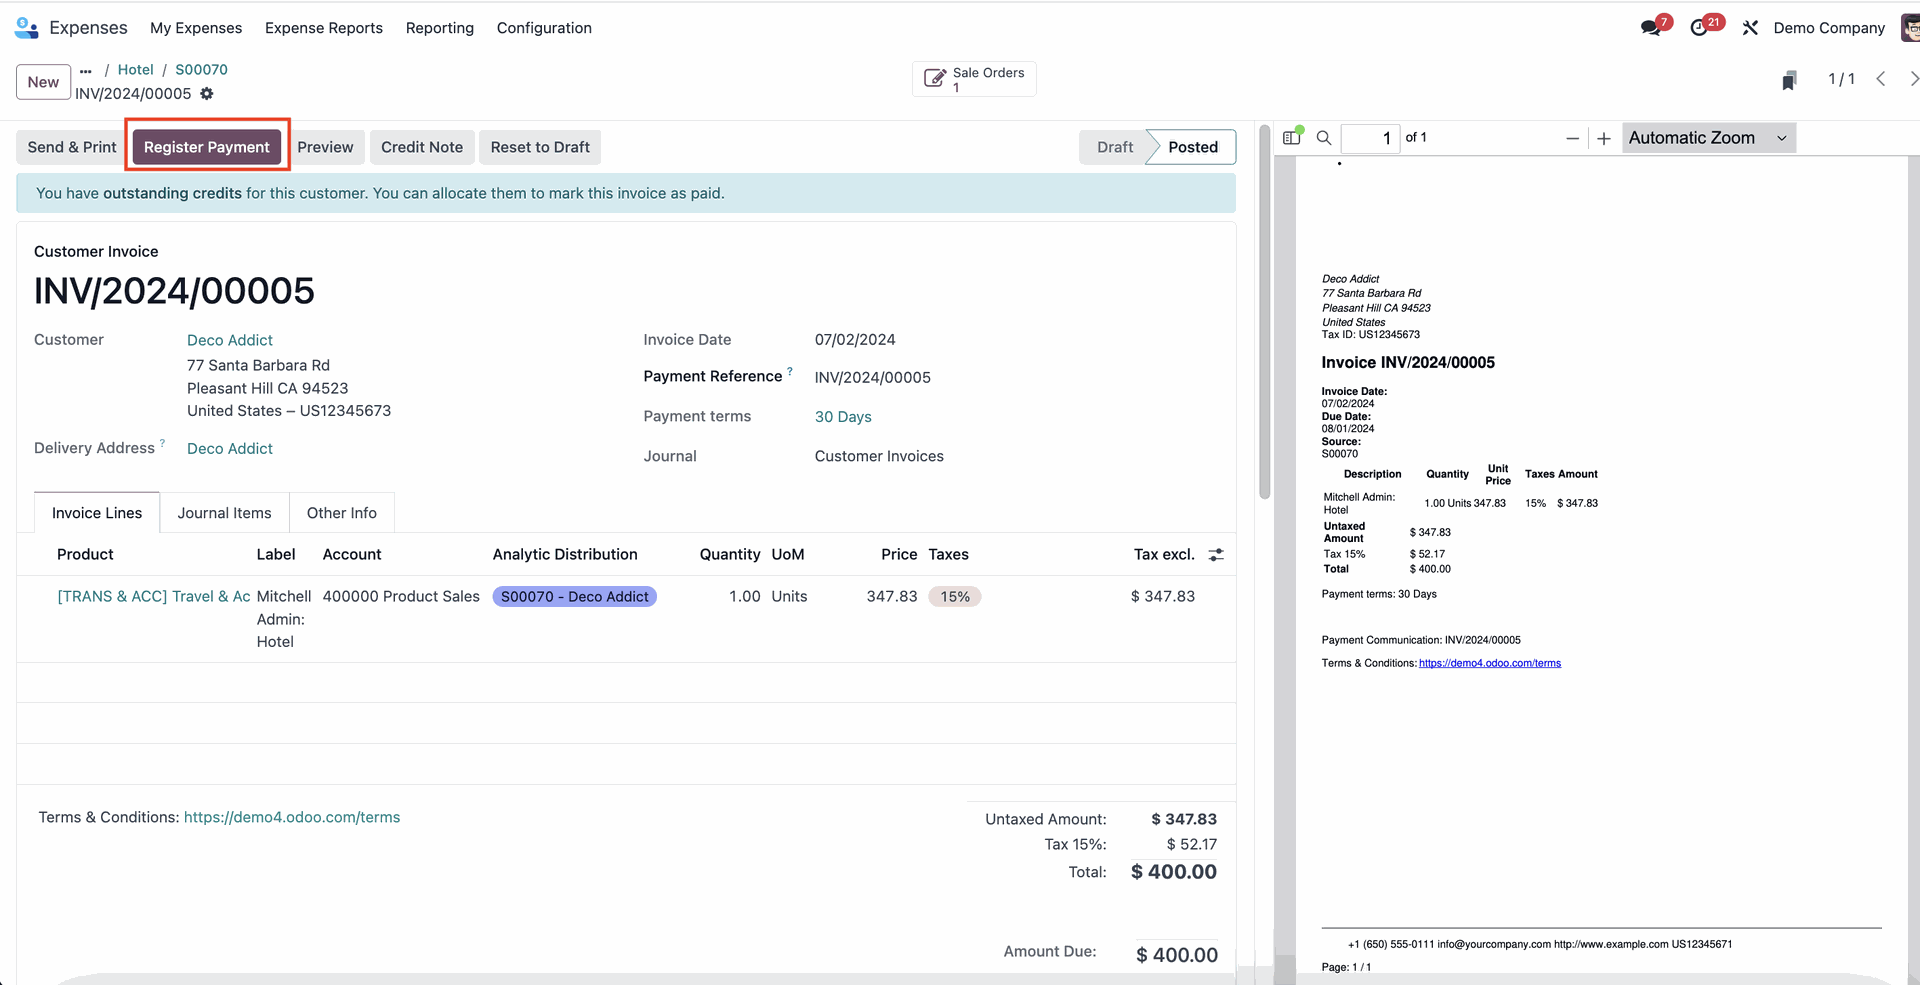
A pop-up will appear to register the payment in Accounting – the information should be correctly auto-populated. Confirm and click "Create Payment".
Once you click the button, the pop-up will disappear and your re-invoicing payment workflow will be complete. You can now reconcile your registered payment directly within your Accounting operations!
Want to fully automate your Accounting operations with Odoo 17?
Whether you’re looking for a standard implementation of Accounting processes or full automation and specific localisations, we can help! With a team of over 70 dedicated experts and a specialised Finance team, we’re ready to support you for a successful Odoo 17 project!
Contact us now and partner up to make the most of Odoo for all your business needs!